How To Divide Orchids – A Step-by-Step Guide to Orchid Propagation

orchid, flower, gold wall-2137992.jpg
Home » Flowers » Orchid » Page 2

Orchid enthusiasts often find themselves faced with mature orchids that have outgrown their pots or become crowded. Orchid division is a crucial skill in orchid care, enabling you to multiply your orchid collection, rejuvenate older plants, and maintain the health and vitality of these exquisite flowers. In this comprehensive guide, we will explore the art of orchid division, providing you with a step-by-step guide, tips, and an array of subtopics to ensure successful orchid propagation. Whether you’re a novice or an experienced orchid grower, learning how to divide orchids can be a rewarding journey into the world of orchid cultivation.
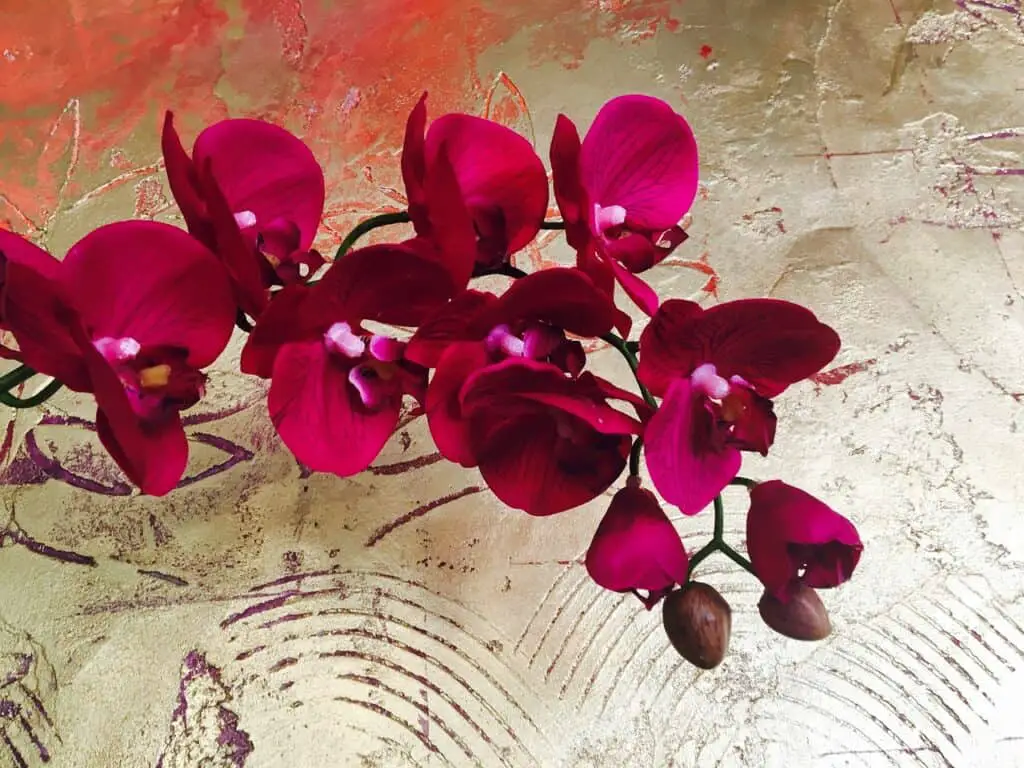
orchid, flower, gold wall-2137992.jpg

Why Divide Orchids?

Before we dive into the how-to, let’s understand why dividing orchids is essential:

  1. Rejuvenation: Mature orchids may become crowded and less vigorous, leading to reduced blooming. Division can rejuvenate the plant and stimulate new growth and flowering.
  2. Propagation: Division allows you to create new orchids from a mature plant, making it an economical way to expand your collection or share with fellow enthusiasts.
  3. Health: Separating overcrowded orchids helps improve air circulation, reducing the risk of disease and pests.

Now, let’s get into the step-by-step process of dividing orchids:

Step 1: Gather Your Supplies

Before you begin, ensure you have the following supplies ready:

  • Healthy, mature orchid plant to be divided
  • Clean, sterilized cutting tool (a sharp knife or shears)
  • New pots or containers
  • Fresh orchid potting mix
  • Labels for pots (to identify the orchid variety)
  • A suitable workspace

Step 2: Choose the Right Time

The best time to divide most orchids is after they have finished flowering or during the growing season when new growth is emerging. This typically corresponds to spring or early summer for many orchid species.

Step 3: Prepare Your Workspace

Select a clean and well-lit area to work. Ensure your tools and pots are clean and sterilized to prevent the spread of diseases.

Step 4: Remove the Orchid from Its Pot

Gently slide the orchid out of its pot. If it’s stuck, you can tap the sides of the pot or use a clean, sterilized knife to loosen the roots from the pot’s edges.

Step 5: Inspect the Roots

Examine the roots to identify suitable sections for division. Healthy roots are firm and green or white, while dead or unhealthy roots are brown or mushy. Cut away any damaged or dead roots, making clean cuts.

Step 6: Divide the Orchid

Look for natural divisions in the plant, such as pseudobulbs or new growths that have roots. Use your sterilized cutting tool to make precise cuts, ensuring that each division has at least one or two healthy pseudobulbs and a portion of the root system. Aim to create divisions with a minimum of three growths.

Step 7: Plant the Divisions

Plant each division in a fresh pot with suitable orchid potting mix. Position the division with its pseudobulbs at or slightly below the soil surface. Gently pack the mix around the roots to provide stability.

Step 8: Label and Water

Label each pot to identify the orchid variety. Water the divisions thoroughly, allowing excess water to drain from the pot. Ensure the potting mix is evenly moist but not waterlogged.

Step 9: Care for the Divisions

Place the newly divided orchids in an area with bright, indirect light. Avoid direct sunlight, as this can stress the divisions. Continue to care for them as you would for mature orchids, providing the appropriate temperature, humidity, and watering.

Step 10: Be Patient

Orchids may take some time to acclimate to their new pots and environment. Be patient and continue to monitor their progress.
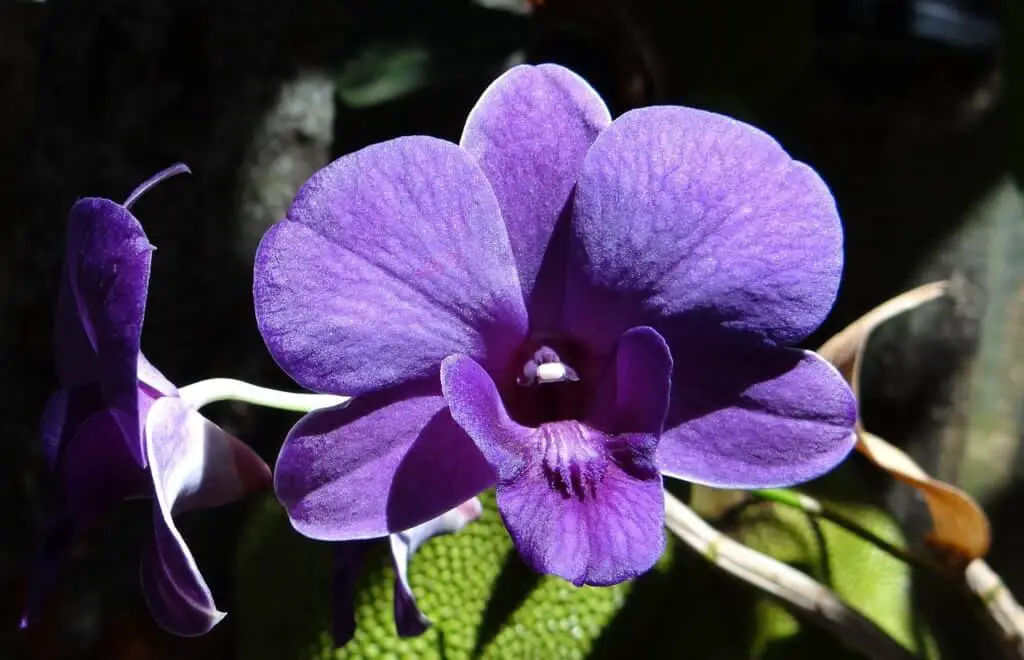
orchid, dendrobium, purple-172206.jpg

When Should You Split Orchids?

The best time to split or divide orchids is typically after they have finished flowering or during their active growing season. This ensures that the orchid has the best chance to establish itself in its new environment.

For many orchids, the post-flowering period in late spring or early summer is ideal for division. This is when the orchid transitions from the flowering phase to the growth phase. It’s a time when the plant is naturally inclined to put energy into new growth.

If you notice your orchid actively producing new shoots or pseudobulbs, it’s a sign that it’s in a growth phase. Dividing during this time allows the divisions to establish themselves and develop before the next blooming season.

Sometimes, overcrowding in the pot can be a clear indicator that division is necessary. When multiple pseudobulbs or shoots are tightly packed, it can hinder air circulation and nutrient uptake, making division a beneficial solution.

Additionally, if you have a mature orchid that seems less vigorous, with fewer blooms and reduced growth, division can help rejuvenate the plant and stimulate new growth.

While these guidelines offer a general framework, it’s crucial to observe your specific orchid’s growth patterns and adapt accordingly. Always have clean, sterilized tools and fresh potting mix at the ready when you decide to divide your orchid, ensuring a smooth and successful process.

Tips for Successful Orchid Division

  • Use clean, sterile tools to prevent infections.
  • Divide orchids on a warm, dry day to promote faster healing of the cuts.
  • Allow divisions to recover in a slightly shaded area.
  • Adjust your care routine as needed based on the specific orchid species you’ve divided.

How Do You Multiply Orchids At Home?

Multiplying orchids at home is a wonderful way to expand your collection and share the beauty of these delicate plants. It’s a rewarding endeavor that offers various methods to choose from, depending on your orchid type and personal preferences.

Start by Gathering Your Supplies: You’ll need a healthy, mature orchid to propagate, clean, and sterilize cutting tools, new pots, fresh orchid potting mix, labels for identification, and a tidy workspace. Having rooting hormones on hand can be useful for certain orchids.

Choose Your Preferred Propagation Method: You have several options, such as division, keiki production, or backbulb propagation. Each method suits different situations, and professional breeders may also use seed propagation for more advanced results.

Timing Is Key: Consider the right time for your chosen method. The division is often best after flowering when the orchid is transitioning to the growth phase. Keikis are ready when they have developed roots and leaves, while back bulbs are prime for propagation when they show signs of new growth.
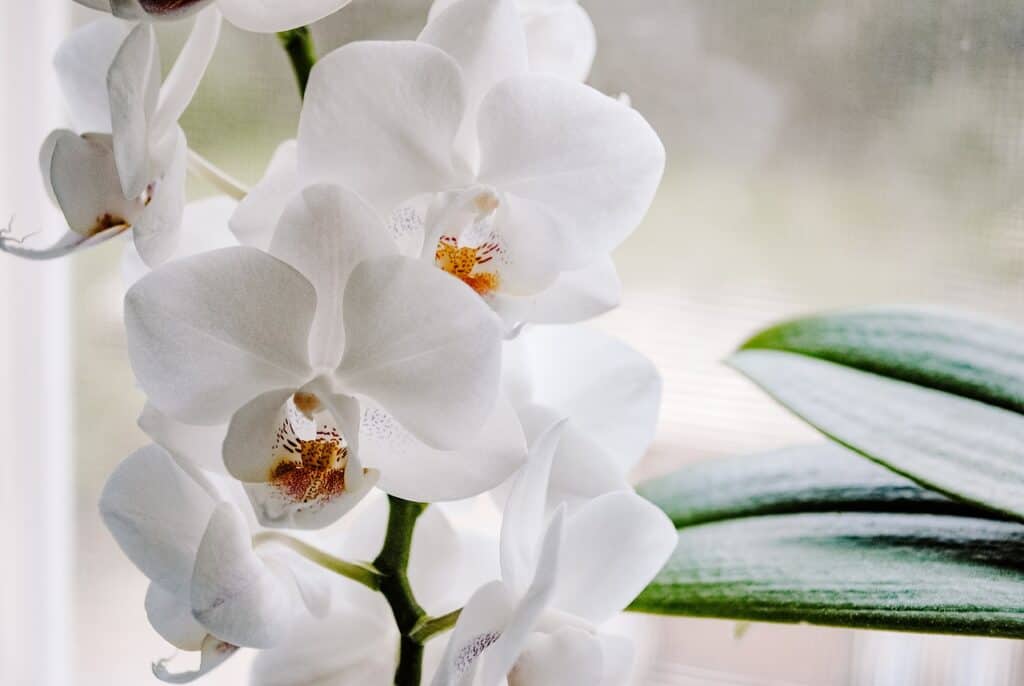
plant, flower, orchid-6691763.jpg

Conclusion

In conclusion, learning how to divide orchids is a valuable skill for orchid enthusiasts. It allows you to maintain the health and vitality of your orchids, propagate new plants, and share your love for these exquisite flowers with others. By following the step-by-step guide and practicing good orchid care, you can successfully divide your orchids and watch them thrive and bloom in their new homes. Whether you’re rejuvenating mature plants or expanding your orchid collection, the orchid division is a rewarding journey that will deepen your appreciation for these stunning plants.
Best Orchid Growing Mediums – A Comprehensive Guide to Nurturing Beautiful Orchids

orchid, flower, blossom-1357032.jpg
Home » Flowers » Orchid » Page 2

Orchids, known for their enchanting allure and exotic beauty, have captivated the hearts of plant enthusiasts worldwide. One of the most critical aspects of their successful cultivation is choosing the ideal growing medium. In this comprehensive guide, we will embark on a journey through the diverse world of orchid-growing mediums, exploring a plethora of options to ensure your orchids not only survive but thrive. Whether you’re an experienced orchid grower or just beginning your orchid journey, understanding the myriad growing mediums available is essential for nurturing healthy and resplendent orchids.

orchid, flower, blossom-1357032.jpg

The Importance of Orchid Growing Mediums

The choice of growing medium plays a pivotal role in the well-being of your orchids. Orchids, primarily epiphytic plants, originate from diverse environments and climates. When cultivated, replicating these conditions becomes paramount. Orchids demand a growing medium that provides optimal aeration, drainage, and stability for their intricate root systems. Let’s delve into various orchid-growing mediums, each offering a unique blend of benefits:

1. Bark-Based Orchid Mix: Bark-based mixes are revered among orchid enthusiasts for their exceptional performance. Typically, they consist of fir bark, sphagnum moss, and perlite. This combination ensures excellent aeration and drainage, while the size of bark particles can be tailored to suit different orchid types and sizes.

2. Coconut Coir: Coconut coir, sourced from coconut husks, offers an eco-friendly and sustainable choice. It retains moisture effectively while providing good aeration, making it ideal for orchids that require consistent moisture levels.

3. Sphagnum Moss: Sphagnum moss, renowned for its moisture-retaining properties, is often favored for orchids that thrive in higher humidity, such as some Dendrobium species.

4. Semi-Hydroponic (LECA – Lightweight Expanded Clay Aggregate): Semi-hydroponic culture entails growing orchids in a medium of LECA beads or other inert materials. This method ensures exceptional aeration and water retention and is embraced for its simplicity.

5. Tree Fern Fiber: Tree fern fiber, a natural growing medium, offers excellent drainage and aeration. It’s a preferred choice for orchid species that flourish in a less compacted, more naturalistic environment.

6. Perlite and Vermiculite Mix: Perlite and vermiculite, both lightweight and sterile materials, are often used as additives to enhance aeration and water retention when blended with other growing mediums like bark.

7. Hydroton: Hydroton, another hydroponic medium, consists of clay pellets that provide stability and aeration. It is gaining popularity among orchid growers for its unique properties.

8. Osmunda Fiber: Osmunda fiber, derived from the roots of the royal fern, is known for its superb drainage and air circulation. It’s an excellent choice for terrestrial orchids.

9. Charcoal: Charcoal, often activated charcoal or horticultural charcoal, can be added to growing mediums to improve drainage and help prevent root rot.

What Is The Best Medium For Growing Phalaenopsis Orchids?

Phalaenopsis orchids, often referred to as “Moth Orchids,” are among the most popular and widely cultivated orchid species. The best medium for growing Phalaenopsis orchids is a well-draining orchid mix that provides excellent aeration while retaining some moisture. Here are some options:

1. Bark-Based Orchid Mix: A mix primarily composed of fir bark or a combination of different types of bark is a popular choice for Phalaenopsis orchids. It provides good aeration, allows water to drain quickly, and mimics the orchid’s epiphytic habitat. The size of the bark particles can vary, catering to different Phalaenopsis types and sizes.

2. Coconut Coir: Coconut coir, derived from coconut husks, is an eco-friendly and sustainable medium. It retains moisture well while maintaining adequate aeration. It’s suitable for Phalaenopsis orchids that prefer more consistent moisture levels.

3. Sphagnum Moss: Sphagnum moss is known for its moisture-retaining properties. It can be used as a component in the growing medium, especially for Phalaenopsis orchids that require higher humidity.

4. Semi-Hydroponic or LECA (Lightweight Expanded Clay Aggregate): Some growers have successfully used semi-hydroponic culture with LECA beads for Phalaenopsis orchids. This method offers excellent aeration and water retention, making it suitable for certain Phalaenopsis varieties.

It’s important to note that the choice of growing medium for Phalaenopsis orchids may also depend on your specific growing conditions and personal preferences. Proper watering practices are essential regardless of the medium you choose. Additionally, Phalaenopsis orchids should be planted in pots or containers with good drainage to prevent waterlogged roots.

Regular monitoring and adjustment of your watering routine are crucial to ensure your Phalaenopsis orchids receive the right balance of moisture. Remember that Phalaenopsis orchids are adaptable, and finding the best medium for your specific environment may involve some experimentation.

orchid, white, white orchid-2181044.jpg

Do I Need Special Soil For Orchids

When it comes to growing orchids, you’ll want to forget about traditional soil. Orchids have unique needs because they’re not soil-dwelling plants. In their natural habitats, orchids cling to trees, rocks, and other surfaces. To recreate these conditions, special growing mediums are used. These mediums are designed to provide the right balance of aeration, drainage, and stability for orchid roots.

Some common orchid-growing mediums include bark-based mixes, coconut coir, sphagnum moss, and even semi-hydroponic setups with LECA beads. These options offer the optimal conditions for orchids to thrive.

Using regular soil can lead to poor drainage and can suffocate orchid roots. So, it’s crucial to choose the right growing medium that matches your orchid’s needs and your local environment. Proper watering practices are also key to keeping your orchids healthy, vibrant, and thriving.

Selecting the Right Orchid Growing Medium

Choosing the best orchid-growing medium is a decision that requires thoughtful consideration. Several factors play a role in making the right choice:

1. Orchid Type: Orchid species have varying preferences for growing mediums. It’s crucial to match the medium to the specific needs of your orchids. For instance, Phalaenopsis orchids often thrive in a bark-based mix, while Dendrobiums may prefer coconut coir or sphagnum moss.

2. Environmental Conditions: Your local climate and the conditions within your home should influence your choice of growing medium. A drier climate might necessitate a medium with good moisture retention, while a humid environment may benefit from a medium that drains efficiently.

3. Watering Habits: Your watering routine is another vital aspect. If you tend to water your orchids less frequently, a mix that retains moisture could be advantageous.

4. Container Type: The type of pot or container you use can also impact your choice of growing medium. Plastic pots, for example, dry out more slowly than clay pots, so your medium should complement the pot material.

5. Expertise and Preference: Your level of experience and personal preference matter. Some growers achieve success with a particular medium due to their expertise and familiarity.

Maintenance and Re-potting:

It’s important to consider the ease of re-potting when selecting a growing medium. Some mediums require less frequent re-potting, while others may demand more frequent attention.

flowers, orchids, white-743373.jpg

Is Moss Or Bark Better For Orchids?

The choice between moss and bark as a growing medium for orchids depends on the specific type of orchid, your growing conditions, and your watering habits. Bark-based mixes offer excellent aeration and are ideal for orchids like Cattleyas and Phalaenopsis with good-sized roots. On the other hand, sphagnum moss retains moisture well and is suitable for orchids that prefer consistently moist conditions or higher humidity levels, such as some species of Masdevallia and Dracula orchids. Experimentation and attention to your orchids’ specific needs will help you find the best medium for your plants.

Conclusion

Choosing the best orchid-growing medium is a critical decision for orchid enthusiasts. By thoughtfully considering the specific needs of your orchid species, your local environment, and your personal preferences, you can select a medium that strikes the perfect balance between aeration, drainage, and stability. Remember that orchids are highly adaptable, and a bit of experimentation can lead to the ideal medium for your unique orchids. With proper care and the right growing medium, your orchids will not only survive but thrive, gracing your space with their extraordinary beauty. Whether you opt for bark-based mixes, coconut coir, or any other medium, the key is to create an environment where your orchids can flourish and enchant with their stunning blossoms.

Orchid Growing In Water Tips – Tips for Successful Water Culture

orchids, blossoms, flower-2055193.jpg
Home » Flowers » Orchid » Page 2

Orchids are renowned for their stunning beauty and unique growing requirements. Traditionally, they are cultivated in well-draining potting mixtures and require a balance of air, water, and light. However, there’s a growing trend in orchid cultivation – growing orchids in water. Water culture is an intriguing and low-maintenance method that has gained popularity among orchid enthusiasts. In this article, we will explore the ins and outs of orchid growing in water, providing you with tips for successful water culture.

How do you keep orchids alive in water?

Growing orchids in water, known as water culture or hydroponics, can be an intriguing and low-maintenance method. To do this, choose orchid varieties that adapt well to water culture, like Phalaenopsis. Select a clear, well-draining container that partially submerges the roots while keeping leaves and pseudobulbs above water. Use purified water, such as distilled or purified water, to prevent mineral buildup. Maintain a consistent water level, so the roots are neither too dry nor submerged. Place your orchid in an area with bright, indirect light, like near a window with filtered sunlight. Apply a diluted orchid-specific fertilizer about once a month during the growing season.

Regularly remove the orchid to rinse its roots under purified water to remove impurities. Check the roots for signs of rot or damage, trimming affected roots when needed. Remember that orchids may take time to adapt to water culture, so be patient and willing to experiment to meet their specific needs. Maintain higher humidity using methods like humidity trays or room humidifiers. By following these steps, you can enjoy the unique experience of growing orchids in water while keeping your plants healthy and thriving.

flower, orchid, purple flower-4725816.jpg

Understanding Water Culture for Orchids

Water culture, also known as hydroponics or semi-hydroponics, is a method of growing orchids without traditional potting media. Instead, the orchid’s roots are submerged or partially submerged in water or a hydroponic nutrient solution. While it may seem unconventional, this approach has its merits, and it’s relatively easy to set up.

Choosing the Right Orchids for Water Culture

Before diving into water culture, it’s important to select orchid species that are more adaptable to this growing method. Some orchids naturally thrive in water culture, while others may struggle. Phalaenopsis orchids are among the most common choices for water culture due to their adaptability and popularity.

Can you grow an orchid in just water?

  1. Select the Appropriate Container: When transitioning your orchid to water culture, choose a container that allows for good air circulation and light penetration. Glass or clear plastic containers work well. Ensure that the container is tall enough to support the orchid and that it can hold enough water to submerge the roots.
  2. Use the Right Water: Orchids in water culture should be placed in distilled or purified water, as tap water may contain minerals and chemicals that can harm the plant. Rainwater can also be a suitable option. Change the water every 7-10 days to prevent stagnation.
  3. Maintain Water Level: The roots should be partially submerged in water, allowing them to absorb moisture and nutrients. Keep the water level consistent to ensure the roots don’t dry out or rot. Monitor the water level regularly.
  4. Provide Adequate Lighting: Orchids still need light to thrive, even in water culture. Place your orchid in a location where it can receive bright, indirect light. A windowsill with filtered sunlight is ideal.
  5. Regularly Rinse Roots: Every few weeks, gently remove the orchid from its container and rinse the roots to remove any accumulated salts or impurities. This helps maintain healthy root function.
  6. Fertilize Sparingly: Orchids in water culture need nutrients, but you should use a diluted orchid-specific fertilizer to prevent overfeeding. Fertilize your orchid about once a month during the growing season, reducing frequency during the dormant phase.
  7. Monitor for Root Health: Keep a close eye on the roots for signs of rot or fungal growth. If you notice any issues, trim away affected roots to prevent further damage.
  8. Transitioning from Soil: If you are transitioning an orchid from soil to water culture, it may take some time for the roots to adjust. Be patient and monitor the orchid’s progress closely.
  9. Experiment and Adjust: Water culture can be a bit of a trial-and-error process. Orchids may respond differently to this method, so be willing to experiment and make adjustments as needed based on your orchid’s specific requirements.
  10. Maintain Humidity: In water culture, the ambient humidity should be relatively high. Consider using humidity trays or room humidifiers to provide a suitable environment for your orchid.
orchid, flower, petals-4920533.jpg

Is it bad for orchids to sit in water?

  • Less frequent repotting: Orchids in water culture generally require less repotting because there’s no need to replace the potting medium.
  • Easier monitoring: Water culture allows for easier inspection of root health, making it simpler to identify and address issues.
  • Reduced risk of overwatering: Orchids are less likely to suffer from overwatering in this method, as they take up water as needed.
  • Lower maintenance: Water culture can be lower maintenance compared to traditional potting mixes, making it an attractive option for orchid enthusiasts with busy schedules.

While water culture can be a successful way to grow orchids, it may not be suitable for all species. It’s essential to remember that orchids are adaptable, and their preferences can vary. Be prepared for some experimentation to determine if water culture is the right approach for your specific orchid and growing conditions.

Propagate Orchid In Water

  1. Select a Healthy Orchid: Start by choosing a mature and healthy orchid plant. Healthy leaves and roots are a good indication that the orchid is suitable for propagation.
  2. Gather Your Supplies: You’ll need a clean pair of scissors or pruning shears, a container, and some rooting hormone (optional).
  3. Prepare the Container: Select a clear container and fill it with distilled or purified water. This container will be the new home for your propagating orchid.
  4. Choose the Right Stem or Pseudobulb: Identify a suitable stem or pseudobulb for propagation. Look for a mature one with nodes, as these are where new growth and roots will develop.
  5. Cut the Stem or Pseudobulb: Use your clean scissors to cut the selected stem or pseudobulb below a node. Make sure to leave a few inches of the stem intact. If you want to speed up root development, consider dipping the cut end in rooting hormone.
  6. Place in Water: Submerge the cut end in the container with water. Keep the cut end underwater, while allowing the upper portion to remain above the waterline. You can use a piece of plastic wrap or a container lid with holes to support the plant while keeping it from touching the water directly.
  7. Provide Adequate Light: Place the container in a location with bright, indirect light. Direct sunlight can be harmful, so ensure the plant gets gentle, filtered light.
  8. Monitor and Change Water: Regularly check the water level and quality. Change the water every week or when it becomes cloudy or discolored to maintain a clean environment for your orchid’s roots.
  9. Be Patient: Orchid propagation is a slow process, taking several weeks to months. Be patient and keep a watchful eye on your propagating orchid.
  10. Transplant to Potting Mix: Once your propagating orchid has developed new growth with several roots, you can transplant it into a suitable orchid potting mix. Carefully remove it from the water, rinse the roots, and plant it in a pot with orchid-appropriate medium.

By following these steps, you can successfully propagate orchids in water and create new orchid plants. It’s essential to maintain cleanliness, provide proper lighting conditions, and be patient throughout the propagation process. Orchids are slow growers, but with dedication and care, you can enjoy the rewarding experience of propagating these beautiful plants.

orchids, blossoms, flower-2055193.jpg

Conclusion

In conclusion, orchid water culture is an intriguing and low-maintenance alternative to traditional potting methods. By following these tips and maintaining a watchful eye on your orchid’s health, you can enjoy the beauty of these exotic plants in a unique and water-based environment. Whether you’re a seasoned orchid enthusiast or a novice looking for a fresh approach to orchid cultivation, water culture offers an exciting and rewarding experience.

How to Choose the Right Orchid Variety: A Guide to Selecting the Perfect Orchid for Your Home

orchids, blue, flowers-4759196.jpg
Home » Flowers » Orchid » Page 2

Orchids are often considered the jewels of the plant world, with their elegant and exotic beauty. They come in an astonishing array of varieties, each with its unique charm and care requirements. Whether you’re a seasoned orchid enthusiast or a novice looking to embrace the world of orchid growing, choosing the right orchid variety is a crucial decision. In this guide, we’ll explore the factors to consider when selecting the perfect orchid for your home, ensuring it not only thrives but also adds a touch of elegance to your space.

orchids, blue, flowers-4759196.jpg

How do I pick the best orchid?

When selecting the best orchid, start by researching different orchid varieties. Consider your home’s growing conditions, such as light, temperature, and humidity. Inspect the plant for firm, green leaves, healthy roots, and no signs of pests or diseases. Examine the flowers for vibrant, unblemished petals and sturdy stems.

Think about the size and shape of the orchid and whether you prefer a fragrant variety. Check the potting mix to ensure it’s suitable. Ask for care information and buy from reputable sources.

Consider your skill level, as some orchids are more forgiving for beginners. Be patient, as orchids may take time to adapt and bloom. Don’t hesitate to seek advice from experienced orchid growers. With thoughtful consideration and care, your orchid will thrive and enhance your living space.

What is the difference between Oncidium and Cattleya?

Before delving into the selection process, it’s essential to understand the different orchid varieties available. Orchids belong to one of the largest plant families, Orchidaceae, with over 25,000 naturally occurring species. These are then further divided into hybrid varieties, resulting in a vast range of choices. Some popular orchid types include:

  • Phalaenopsis (Moth Orchids): Known for their stunning and long-lasting blooms, Phalaenopsis orchids are ideal for beginners due to their relatively straightforward care requirements.
  • Cymbidiums: These orchids are loved for their impressive sprays of blossoms and are often used for cut flowers.
  • Dendrobiums: Dendrobium orchids are diverse in size and appearance, making them a favorite among orchid enthusiasts.
  • Cattleyas: Often called the “queen of orchids,” Cattleyas are renowned for their large, colorful blooms and a pleasant fragrance.
  • Oncidiums: These orchids feature unique and often fragrant flowers and are known for their dancing lady-shaped blossoms.
  • Vandas: Vandas are prized for their vibrant, large flowers and are often grown hanging or mounted.
  • Miltonias: Also known as Pansy Orchids, Miltonias offer an array of attractive colors and patterns.

Each variety has its own distinct characteristics, including flower size, shape, color, fragrance, and care requirements. Understanding these differences is the first step in choosing the right orchid variety for your home.

orchid, flower, houseplant-4068853.jpg

What type of orchid is best for beginners?

One of the most critical factors when choosing the perfect orchid variety is your growing conditions. Orchids are highly adaptable, but their needs can vary depending on the variety. Here are some key considerations:

  • Light: The amount and type of light your orchid requires can vary. While Phalaenopsis thrives in low to medium light, Cymbidiums prefer bright, indirect light. Assess the natural light in your home to determine which orchid varieties will flourish.
  • Temperature: Orchids have different temperature preferences, and not all can tolerate extreme conditions. Some thrive in intermediate temperatures, while others prefer warmer or cooler environments. Be sure to select an orchid variety that matches your climate.
  • Humidity: Humidity levels can also impact orchid health. If you live in a dry climate, consider varieties like Phalaenopsis, which are more forgiving of lower humidity levels. If you can provide higher humidity, you have a wider range of options.
  • Growing Space: Consider where you’ll place your orchid. Some varieties grow well in pots, while others are better suited for hanging or mounting. Make sure you have the right space and equipment for your chosen orchid variety.


Best Orchids For Indoors

Different orchid varieties come with varying care demands, and it’s important to choose one that aligns with your time and commitment. Here are some maintenance factors to consider:

  • Watering: Some orchids prefer to dry out between waterings, while others like consistently moist conditions. Understanding your orchid’s specific watering needs is crucial for its overall health.
  • Fertilizing: Fertilization schedules can differ among orchid varieties. Some may require frequent feeding, while others thrive on a more minimal diet.
  • Pruning and Repotting: Orchids may need occasional pruning and repotting to encourage healthy growth. Be prepared to meet these maintenance requirements.
  • Pests and Diseases: Different orchids may be more or less susceptible to pests and diseases. Know what to watch for and be prepared for preventative measures.

How To Keep Orchids

Finally, it’s important to consider your personal preferences and the aesthetics you desire in your home. Orchids come in a wide range of colors, shapes, and sizes, allowing you to choose a variety that complements your interior décor. Additionally, some orchids are fragrant, making them a delightful addition to your space. Your personal taste and the ambiance you wish to create should guide your choice.

orchid, flower, blossom-4780.jpg

Conclusion

Selecting the right orchid variety is a rewarding process that involves understanding the diverse options, your home’s growing conditions, maintenance requirements, and your personal preferences. By carefully considering these factors, you can choose the perfect orchid variety that will not only thrive but also grace your home with its enchanting beauty. Remember that every orchid is unique, and cultivating a connection with your chosen variety will deepen your appreciation for these extraordinary plants. Whether you opt for the elegant Phalaenopsis or the exotic Cattleya, your journey into orchid cultivation promises to be a fulfilling and visually stunning experience.

Orchid Care During Flowering Period – A How To Guide

flower, flora, orchids-7203048.jpg
Home » Flowers » Orchid » Page 2

Orchids are known for their exquisite and delicate beauty. These flowering plants can add a touch of elegance to any space, making them a popular choice for indoor gardeners. When orchids enter their flowering period, they produce magnificent blooms that captivate and mesmerize. Proper care during this crucial phase is essential to ensure your orchids stay healthy and maintain their stunning display. In this article, we will explore the ins and outs of orchid care during the flowering period, offering insights and tips to keep your orchids flourishing.

Understanding the Orchid Flowering Period

Before diving into the specifics of caring for your orchids during their flowering phase, it’s important to understand the basics. The flowering period is a critical stage in an orchid’s lifecycle. It’s the time when the orchid produces beautiful, colorful flowers, and it typically occurs once a year, although it can vary depending on the orchid species.

The flowering period is a time of increased vulnerability for the orchid. The plant invests a significant amount of energy in producing these lovely blossoms, which can leave it more susceptible to stress, diseases, or neglect. This is why providing the right care is crucial to ensure your orchids continue to thrive.

flower, flora, orchids-7203048.jpg

How do you take care of orchids while they are blooming?

Proper lighting is one of the most critical factors in orchid care during the flowering period. Orchids require the right balance of light to produce vibrant blooms. Here’s what you need to know:

  • Indirect Light: During the flowering period, orchids need bright but indirect light. Placing them near a south or east-facing window with sheer curtains or blinds to filter the sunlight is ideal.
  • Avoid Direct Sunlight: Direct sunlight can scorch the delicate petals of orchids. If you notice your orchids receiving too much sun, move them to a slightly shadier spot.
  • Monitor Light Levels: Depending on your location and the orchid species, the ideal lighting conditions may vary. Keep an eye on your orchids and adjust their location as needed to provide the right amount of light.

Temperature and Humidity

Orchids are highly sensitive to temperature and humidity. To ensure a healthy flowering period, maintain these factors within the recommended range:

  • Temperature: Orchids generally thrive in temperatures between 60°F to 80°F (15°C to 27°C) during the day, with a slight drop at night. This temperature differential helps stimulate the flowering process.
  • Humidity: Orchids prefer higher humidity levels, ideally around 50-70%. You can increase humidity by using a humidity tray, a room humidifier, or by misting your orchids regularly.
orchids, blossoms, flower-2055193.jpg

Watering Practices

Proper watering is crucial for orchid care during the flowering period. Overwatering or underwatering can be detrimental to your orchids. Follow these guidelines:

  • Water Quality: Use room temperature or lukewarm water to avoid shocking the orchids. Rainwater or distilled water is best, as it’s free from chemicals and minerals that can harm your plants.
  • Watering Frequency: Water your orchids when the top inch of the potting mix is dry to the touch. This may vary depending on factors like the type of orchid, the potting mix, and environmental conditions. Be cautious not to let them sit in standing water, as this can lead to root rot.
  • Avoid Wetting the Flowers: When watering your orchids, try to keep the water away from the flowers. Wet blossoms can lead to fungal diseases or rot.

Should you feed orchids when they are flowering?

Fertilization is essential for providing your orchids with the nutrients they need to bloom and thrive. During the flowering period, adjust your fertilization routine to promote flowering:

  • Fertilizer Selection: Choose a balanced orchid fertilizer with a lower nitrogen content and higher levels of phosphorus and potassium. This will encourage flower production.
  • Frequency: Fertilize your orchids every two to four weeks during the flowering period. Reduce or halt fertilization during the dormant phase.

How to make orchids bloom constantly

Proper maintenance and pruning can help your orchids channel their energy into producing stunning blooms:

  • Pruning: Remove any dead or yellowing leaves and spent flower spikes. Pruning will allow your orchid to direct energy to new growth and blooming.
  • Support Structures: Use stakes or supports to keep flower spikes upright and prevent breakage.

With these practices in mind it will be a lot easier as a home gardener to ensure that our orchids are blooming constantly.

flowers, orchid, bloom-6926633.jpg

Pest and Disease Management

During the flowering period, orchids can be more susceptible to pests and diseases. Regularly inspect your plants for any signs of trouble, such as yellowing leaves, black spots, or pests like mealybugs or spider mites. If you notice any issues, take immediate action to address them.

Conclusion

In conclusion, caring for your orchids during the flowering period is a rewarding experience that can lead to months of vibrant, breathtaking blooms. With the right balance of light, temperature, humidity, watering, fertilization, and maintenance, you can ensure your orchids remain healthy and continue to display their stunning flowers year after year. Remember, each orchid is unique, so closely observe your plant and adjust your care routine as needed to cater to its specific requirements. With a little love and attention, your orchids will reward you with their enchanting beauty throughout their flowering period.

How To Care For Orchid After Flowers Fall Off

orchid, flower, petals-4920533.jpg
Home » Flowers » Orchid » Page 2

Orchids are one of the most popular flowering plants, with a wide variety of species that come in different sizes, shapes, and colors. These beautiful plants have been an important part of different cultures worldwide, serving several purposes, from medicinal to decorative. However, taking care of orchids can be challenging, and it’s essential to understand how to care for them properly.

In this article, we’re going to discuss how to care for your orchids after their flowers have faded away. We’ll be covering some of the best practices you can adopt to maintain the health and beauty of your orchids, no matter their species.

flower, orchid, purple flower-4725816.jpg

Why Orchids Are Special Plants

Orchids are unique plants in several ways, from their beautiful flowers to their unique characteristics. The following sub-sections highlight some of the reasons why orchids are so special.

The Importance of Orchids in Different Cultures

Orchids have been a part of different cultures worldwide, serving several purposes. For instance, in ancient Greece, they were associated with virility, and warriors believed that consuming the ground orchid’s root increased their potency. In China, orchids were used to reinforce moral values as they symbolized friendship and nobility. In Japan, orchids were considered a sign of wealth and luxury, and only the rich could afford to grow them.

Understanding the Different Varieties of Orchids

To properly care for orchids, you need to understand the different types of orchids as they have unique care requirements. There are over 25,000 orchid species worldwide, but some popular ones include Phalaenopsis, Cattleya, and Dendrobium. Phalaenopsis, also known as “moth orchid,” is one of the most common orchids, while Cattleya orchids are known for their colorful and fragrant flowers. Dendrobium orchids come in a variety of colors and shapes and prefer cool temperatures.

Knowing the Best Time to Re-Pot Your Orchid

Orchids need to be repotted regularly to prevent overcrowding and to provide fresh media that support their growth. The right time to repot your orchid depends on several factors such as its species, age, and growth rate. Generally, orchids should be repotted every twelve to eighteen months.

How to Care for Orchids After Their Flowers Fade Away

After your orchids have finished blooming, it’s time to start caring for them differently to ensure they remain healthy. The following sub-sections discuss some practices that can keep your orchids strong and healthy after their flowers have wilted.

Implementing Proper Irrigation Techniques

Orchids are sensitive to overwatering and underwatering. Therefore, it’s crucial to use proper irrigation techniques to keep them healthy. The right technique depends on the orchid species and humidity levels in your area. For example, you can use the bottom watering technique for Phalaenopsis orchids to avoid wetting their leaves and causing rot.

Strategies for Maintaining Your Orchid’s Health

To keep your orchids healthy and help them recover from blooming, you need to adopt some strategies. These strategies include proper fertilization, monitoring their environment, and identifying and treating any disease or pest infestation.

Tips for Fertilizing Your Orchids

Fertilizing your orchids is an essential practice to ensure they receive the necessary nutrients for growth and health. The right fertilizer depends on the orchid species and your location. You can use a balanced fertilizer, such as 20-20-20, during the growing season, and a low-nitrogen one during the winter dormancy period.

Maintaining Optimum Temperature, Humidity, and Light Conditions

Orchids need specific temperature, humidity, and light conditions to thrive. Too much or too little of any of these factors can harm your orchids. For instance, most orchids require at least six hours of indirect sunlight, while exposure to direct sunlight can scorch their leaves. You should also ensure that your orchids are not exposed to low temperatures that can cause wilting.

Identifying and Treating Common Orchid Diseases

Orchids are prone to several diseases and pests, such as fungal infections, viruses, and spider mites. It’s essential to monitor your orchids regularly to detect any signs of disease or pest infestation. You can spot early signs of common diseases such as black rot, which is characterized by black, foul-smelling spots on the leaves. Treating orchid diseases and pests requires prompt action, such as using appropriate fungicides or insecticides.

flowers, orchid, bloom-6926633.jpg

Conclusion

Orchids are special plants that require knowledge and patience to care for properly. After their flowers have faded away, adopting some practices can ensure your orchids remain healthy and bloom again. Taking care of orchids can be challenging, but it’s a rewarding experience that can teach you patience and appreciation for the beauty of nature. By following the tips provided in this article, you can enjoy your orchids’ beauty for years to come.

How To Remove Keiki From Orchid Stem

flower, orchid, plant-3097458.jpg
Home » Flowers » Orchid » Page 2

Orchids are a favorite among gardeners due to their delicate beauty and the unique shapes and colors of their blooms. However, orchid plants have their own unique challenges, and one of them is the Keiki. Keiki is a Hawaiian term that means “baby” and refers to the tiny plantlets that sometimes grow on the stem of an orchid. While these little Keiki can be adorable, they can also stunt the growth and development of the main plant if not removed. In this article, we will give you a step-by-step guide on how to remove Keiki from an orchid stem in three simple steps.

orchid, flower, houseplant-4068853.jpg

What Are Keiki and Why Should You Remove Them

An orchid plant can reproduce in two ways: by seed or by asexual reproduction. Keiki growth is an example of asexual reproduction. It occurs when a node on the orchid stem develops into a miniature plantlet that is genetically identical to the parent plant. This process of Keiki growth is a survival mechanism that ensures the propagation of the species through the production of offspring without the need for sexual reproduction.

However, Keiki growth can also be a sign of stress on the main plant. When an orchid is experiencing stress due to factors like inadequate light or nutrition, it may respond by producing Keiki growth on the stem. The Keiki draws resources from the main plant, which can negatively impact its growth and flowering, making it essential to remove them.

Identifying Keiki on Your Orchid Stem.

Before removing Keiki from an orchid, it’s important to identify them. A Keiki can look like a miniature orchid plant growing on the stem of the main plant. It usually has roots, leaves, and a stem, just like a mature orchid plant. Some orchids also produce Keiki that grow at the base of the plant, along the roots, or even on the flower stalk.

Keiki growth can sometimes appear to be a flower spike, but they are easy to differentiate as they will have leaves, while flower spikes will not. When they grow on the stem, they can produce bright green leaves, which can make them stand out more.

Preparing Your Tools and Work Area for Keiki Removal.

To remove Keiki from an orchid stem, you will need a few essential tools to ensure a successful operation. Some of the tools you will need include a pair of sterilized, sharp pruning scissors or shears, a clean workspace is important to avoid the introduction of bacteria or viruses to the parent plant, and a clean pot with fresh potting soil to replant your Keiki.

How to Sterilize Your Tools and Workspace for Safe Keiki Removal.

Sterilizing your tools and workspace is important to prevent the spread of diseases to the parent plant. Use alcohol or a sterilizing solution to clean your tools before and after use to ensure they are free from infectious agents. It’s also advisable to work on a clean and sterile surface by wiping down your work area with alcohol.

flower, orchid, botany-3992392.jpg

Removing Keiki from Your Orchid Stem.

Step 1: Locate the Keiki on the stem. Generally, Keiki is easy to see on the stem of the orchid. Identify the point where the Keiki is attached to the stem.

Step 2: Cut the stem of the orchid. Carefully cut the stem of the orchid below the Keiki using sharp scissors or shears. Make sure to check that the tool’s sharp and clean before use.

Step 3: Plant the Keiki. Take the Keiki you removed from the stem and plant it into a smaller pot. Fill the pot with fresh potting soil, and water the plant so that the soil is moist but not waterlogged.

Tips and Tricks for Successful Keiki Removal.

When removing Keiki from an orchid stem, there are a few things you should keep in mind to ensure a successful operation. One of the most important things to remember is always to use sharp, sterilized tools to avoid introducing pathogens into the parent plant. It’s also essential to plant the Keiki in a separate container to provide it with the required nutrients and space to grow.

Benefits of Keiki Removal for Orchid Care and Maintenance.

Removing Keiki from an orchid stem is an important aspect of orchid care and maintenance. In addition to improving the growth and development of the main plant, it also provides an opportunity for you to propagate new orchid plants. This not only increases the number of orchids you have in your garden but also provides a great way of sharing your love for orchids with others.

Keiki growth is a sign of stress on the main plant and can negatively impact its growth and development. Removing the Keiki in 3 simple steps is a key step in orchid care and maintenance. While Keiki growth is a natural survival mechanism of the orchid plant, removing them gives the main plant a chance to redirect its resources and energy into producing more blooms, making it a key element in any gardener’s toolkit.

How Many Ice Cubes For An Orchid

orchid, flower, blossom-4780.jpg
Home » Flowers » Orchid » Page 2

Orchids are beautiful and delicate houseplants that require specific care and attention to thrive. Among the essential things to consider is how to properly water them to keep them healthy and vibrant. Different methods of watering work well for various types of orchids, and one of the methods gaining popularity among orchid enthusiasts is using ice cubes.

Benefits of using ice cubes for orchid watering

The use of ice cubes for watering orchids is becoming popular because it offers several benefits. Firstly, it ensures that the roots of the plant are not drowned by offering a slow and even release of water. When you use traditional watering methods where you pour water directly onto the soil or pot, water can easily pool up around the roots, leading to root rot. Secondly, it is an easy and convenient method of watering your orchid as you don’t have to mix or measure anything like fertilizers, water, or any other additives. Lastly, it can be a great way to manage water usage as you can control the amount of water you use, which can reduce waste.

orchid, flower, blossom-1357032.jpg

How to prepare the ice cubes for orchid watering

Before using ice cubes to water your orchid, you need to prepare them correctly to ensure they are safe for your plant. You need to consider the type of water you use for making the ice cubes and how to prevent contamination in ice cube trays.

Type of water to use for making ice cubes.

Use distilled water or purified water to make ice cubes for watering orchids. Using tap water can be problematic as it can have chlorine and fluoride, which can harm the roots of your plant. If you can’t use distilled or purified water, fill your container with tap water and let it sit for at least 24 hours to allow the chlorine and fluoride to dissipate.

How to prevent contamination in ice cube trays.

Contamination of ice cube trays can introduce harmful chemicals to your orchids, such as dish detergent or bleach, which can harm the root system. Ensure that the tray is clean of any debris, mold, or algae before using it to make ice cubes. Rinse the tray with distilled water or purified water before making the ice cubes.

When and how often to water your orchid with ice cubes

Watering your orchid with ice cubes requires careful timing and frequency. Here are some tips on how to determine when and how often to water your orchid with ice cubes.

How to determine when your orchid needs watering

There are several ways to tell if your orchid needs watering, including checking for dryness of the potting mix, lifting the pot to feel its weight of it, or observing the leaves and pseudobulbs of the orchid. However, one reliable way you can use when using ice cubes as a water option is to place one or two cubes on the soil and observe how long they take to melt. If they take longer than an hour to melt, it means your orchid is not thirsty, and if they take less than an hour to melt, it’s time to water your plant.

How often to water your orchid with ice cubes

The frequency of watering orchids with ice cubes will depend on the environment, type of orchid, potting mix, and personal preference. In general, ice cube watering intervals can range from once a week to once a month or even longer. As you experiment with different frequencies, observe the plant’s behavior to determine the best interval that works for you.

orchid, flower, blossom-4780.jpg

Additional tips for orchid care

To ensure that you get the most out of watering your orchid with ice cubes, here are some additional tips to keep in mind.

Other important aspects of orchid care

Besides watering your orchids with ice cubes, other critical aspects of orchid care include providing the ideal lighting, temperature, humidity, and air circulation. Be sure to research the specific requirements of your orchid species to give it the best possible care.

Common mistakes to avoid when using ice cubes to water your orchid.

It’s common to make mistakes when adopting a new process for watering your orchid. Here are some common ones to avoid when using ice cubes:

– Using too many or too few ice cubes.

– Allowing the orchid pot to sit directly on the ice.

– Not monitoring the melting rate or the wetness of the potting medium.

– Continuing to use ice cubes in the winter months when the air temperature is cooler.

Properly watering your orchid is crucial to its overall health and longevity. Using ice cubes can be an effective way to water orchids as it offers slow and even watering, is easy to manage, and saves water. However, it’s crucial to prepare the ice cubes correctly and consider the frequency of watering. By following these simple guidelines, you can successfully use ice cubes to water your orchid and help it thrive. Additionally, it’s important to remember that watering is just one aspect of orchid care and to make sure to pay attention to the other critical requirements such as lighting, temperature, and air circulation for healthy and vibrant plants.

How To Revive Wilted Orchid Flowers

orchid, flower, petals-4920533.jpg
Home » Flowers » Orchid » Page 2

Orchids are one of the most popular and sought-after houseplants. These beautiful and delicate flowers are known for their exotic beauty and attractiveness. Orchids can add a touch of elegance to any space, and their beauty can be enjoyed for weeks or even months with proper care. However, like any other plant, orchids can suffer from various problems, and one of the most common issues orchid owners encounter is wilted flowers. Fortunately, with the right knowledge and tools, it is possible to revive wilted orchid flowers and bring them back to their former glory. In this post, we will provide a step-by-step guide on how to revive wilted orchid flowers and keep them looking beautiful and healthy.

orchid, flower, petals-4920533.jpg

What Causes Orchid Flowers to Wilt

Orchids are native to tropical and subtropical regions around the world and require specific conditions to thrive. These conditions include a well-draining and aerated growing medium, high humidity levels, and indirect sunlight. When these conditions are not met, orchids may suffer from various symptoms, including wilted flowers.

Orchid pests and diseases.

Orchids are susceptible to pests and diseases, just like any other plant. Some common pests that can affect orchids include spider mites, mealybugs, and scale insects, while common diseases include fungal and bacterial infections. These pests and diseases can affect orchids’ ability to absorb water and nutrients, causing their flowers to wilt.

Steps to Revive Wilted Orchid Flowers

Before you can revive wilted orchid flowers, you must first identify the problem. This can be done by examining the plant carefully and looking for signs of pests or diseases. Check the plant’s leaves and stems for any discoloration, spots, or unusual growth. Also, check the plant’s growing medium to see if it is too dry or waterlogged.

Watering and humidity requirements.

If the problem is due to improper watering or low humidity levels, there are several steps you can take to revive wilted orchid flowers. First, check the plant’s growing medium and make sure it is moist but not waterlogged. If it is too dry, give the plant a good soaking and allow it to drain thoroughly. If it is waterlogged, repot the plant in the fresh growing medium.

Next, increase the humidity level around the plant by placing a tray of water near the plant or using a humidifier. You can also mist the plant regularly with water to keep the leaves and flowers hydrated. Finally, make sure the plant is not getting too much direct sunlight, which can cause the flowers to wilt.

Repotting or dividing the plant.

If the problem is due to overcrowding or root damage, repotting or dividing the plant may be necessary. To repot the plant, remove it from its current pot and gently separate the roots from the old growing medium. Trim any dead or damaged roots and repot the plant in the fresh growing medium.

If the plant is overcrowded, divide it into smaller sections, making sure each section has healthy leaves and roots. Repot the divided sections in the fresh growing medium and provide the necessary care.

Tips for Orchid Flower Maintenance

Fertilization is essential for the healthy growth of orchids. Most orchids require a balanced fertilizer that is specifically designed for orchids. Fertilize the plants regularly, following the instructions on the package. Be careful not to over-fertilize, as this can damage the plant’s roots and cause wilting.

Proper lighting.

Orchids require indirect sunlight to thrive. Place the plant near a window where it can receive filtered sunlight, or use a grow light to provide the necessary light. Avoid placing the plant in direct sunlight, as this can cause the flowers to wilt.

Temperature maintenance.

Orchids prefer warm and stable temperatures. Keep the plant in a room with a temperature range of 60-85°F. Avoid placing the plant near drafty areas or heating vents, which can cause the temperature to fluctuate, causing the flowers to wilt.

orchid, flower, houseplant-4068853.jpg

Conclusion

Orchids are beautiful and delicate plants that require specific conditions to thrive. Wilted flowers are a common problem that can be caused by various factors, including improper watering, low humidity levels, and pests or diseases. To revive wilted orchid flowers, it is essential to identify the problem and take appropriate steps to address it. Regular maintenance, including fertilization, proper lighting, and temperature maintenance, can help prevent wilting and keep the flowers looking beautiful and healthy. With the right care and attention, orchid enthusiasts can enjoy the beauty of these exotic flowers for years to come.

How To Regrow An Orchid Stem

orchid, white, white orchid-2181044.jpg
Home » Flowers » Orchid » Page 2

Orchids, with their bright and exotic blooms, are a favorite among many gardeners. Regrowing a wilted or damaged orchid stem can be an intimidating task for beginners. With the right tools, knowledge, and patience, anyone can regrow an orchid stem. A healthy orchid stem is crucial to the overall health and growth of an orchid plant. This step-by-step guide for beginners will walk you through the process of regrowing an orchid stem and ensuring the longevity of your orchid plant.

Why is regrowing an orchid stem important?

Regrowing an orchid stem is vital to the well-being of the orchid plant. The stem of an orchid is where all the vital nutrients and water are transported from the roots to the leaves and flowers. A damaged stem can lead to a stunted plant that cannot produce vibrant blooms or healthy foliage. Once the stem begins to wither, it can be challenging to revive the orchid plant.

An orchid plant’s life cycle is unique; every stage requires specific care and attention. The following sections will provide a detailed guide on how to care for an orchid plant and regrow a damaged stem.

orchids, flowers, white flowers-1866867.jpg

Regrowing an Orchid Stem: The Step-by-Step Guide for Beginners

The following guide will help you regrow a damaged or wilted orchid stem.

Essential tools and materials for Regrowing an Orchid Stem

To regrow an orchid stem, you’ll need the right tools, such as a pair of sharp sterilized scissors, a pot with drainage holes, and a suitable potting mix that provides good drainage and aeration.

When selecting a pot, choose one that is just slightly larger than the orchid plant’s root system. Avoid using a pot that is too large, as this can lead to waterlogged roots and root rot. A potting mix that provides proper drainage and aeration is essential. Orchids require well-draining soil that retains moisture but doesn’t become waterlogged. A suitable potting mix can be made by combining bark, perlite, and charcoal in equal parts.

Identifying the Right Amount of Light and Humidity for Orchid Growth

Orchid plants require adequate lighting and humidity to thrive. Orchids thrive in bright, indirect sunlight but avoid direct sunlight which can scorch the leaves and damage the plant.

Humidity is crucial for orchid growth and is typically higher than what many indoor environments provide. You can increase the humidity in your home by placing a tray of water near the orchid plant or using a humidifier. Misting the plant’s leaves once or twice a day with room temperature water can also help increase humidity.

Cutting the Orchid Stem: Tips and Tricks

Cutting the orchid stem can be intimidating, but it is a crucial step in regrowing a wilted or damaged stem. The following tips can help ensure a successful cut.

Identifying the Right Spot to Cut the Stem

Identifying the right spot to cut the stem is crucial. Cut the stem above the damaged or wilted portion, just a little above the node or bud where the orchid stem bloomed last. Cutting the stem too low can cause damage to the plant, and cutting it too high may not produce new growth.

Understanding the Anatomy of the Stem

Understanding the anatomy of the orchid stem is essential. The orchid stem is made up of nodes, buds, and internodes. Nodes are the little spots along the stem where the orchid blooms. Buds are the small growths that form along the stem and create new blooms. Internodes are the spaces between the nodes on the stem.

When cutting the stem, cut right above the node or bud where the orchid last bloomed. This will encourage new growth to appear.

orchid, white, white orchid-2181044.jpg

Caring for the New Orchid Stem

Caring for a new orchid stem involves proper watering, fertilizing, and monitoring growth.

Watering and Feeding

Watering an orchid requires a delicate balance of moisture and air. Water the orchid once a week, or whenever the potting mix feels dry. Avoid overwatering, as this can lead to root rot. Allow the potting mix to dry out between waterings. Feeding the orchid a balanced fertilizer every few weeks will also help promote healthy growth.

Identifying Signs of New Growth and Monitoring Progress

Once you have cut the orchid stem, it’s essential to monitor the plant’s progress. Look for new growth and signs of healthy leaves and roots. A new stem can take several weeks to grow, so patience is key. Monitor the plant’s progress and adjust the care routine as needed.

Conclusion

Regrowing an orchid stem can be a daunting task, but with the right tools and knowledge, it is possible. A healthy orchid stem is essential to the success of an orchid plant. By following this step-by-step guide, you can help ensure your orchid plant’s longevity and produce vibrant blooms for years to come. Remember to be patient and monitor the plant’s progress regularly. And most importantly, enjoy the journey of watching your orchid grow!