Parsley Smell Like Soap – Why This Might Be

parsley, green, seasoning-232697.jpg
Home » parsley plant

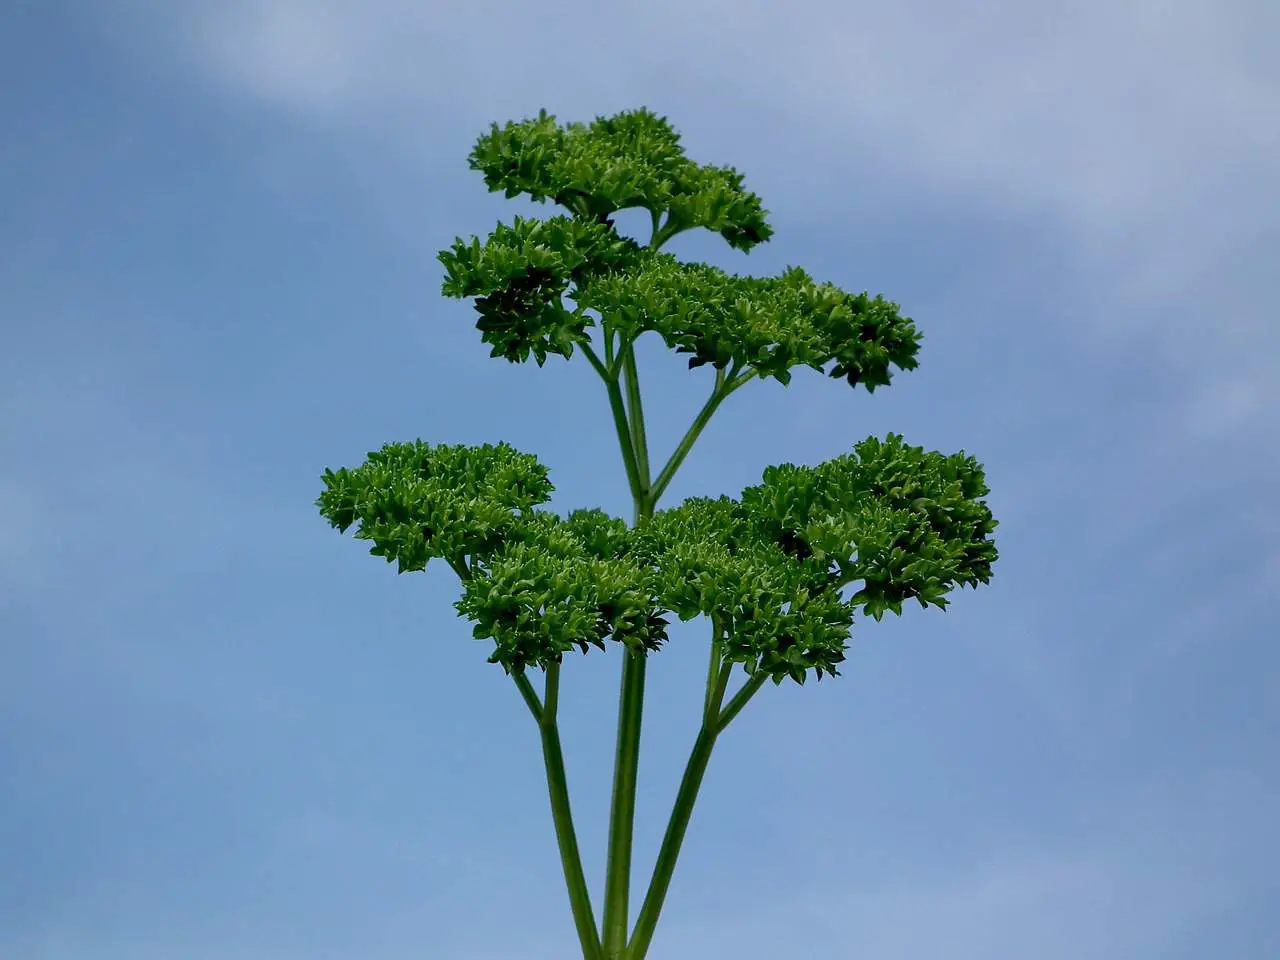
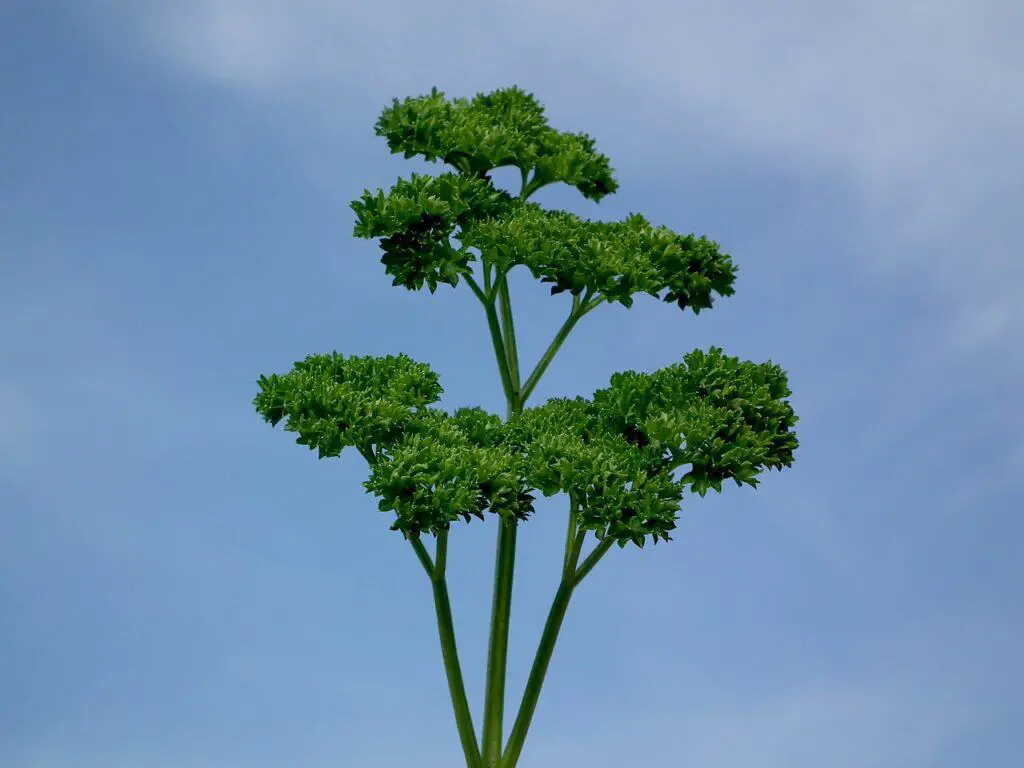
Parsley, a versatile herb that graces countless dishes worldwide, is no stranger to curious associations. One intriguing observation is the assertion that parsley smells like soap. Delving into this aromatic mystery, we’ll explore the interconnected world of parsley’s sensory experiences. From its distinct soapy scent to its grassy taste and occasionally unfavorable flavor, let’s uncover the nuances of parsley that often leave us questioning our culinary senses.

Parsley Smells Like Soap

The assertion that parsley smells like soap is not an uncommon sentiment. Many individuals detect a fragrance reminiscent of soap when handling or chopping fresh parsley. This phenomenon often prompts a moment of pause in the kitchen, leading us to ponder the intriguing connection between this herb and the world of cleanliness. While the soapy scent of parsley is subjective, it has sparked discussions among cooks and food enthusiasts alike. Some attribute it to specific compounds within the herb, while others speculate on the influence of individual taste perceptions.

parsley, green, seasoning-232697.jpg

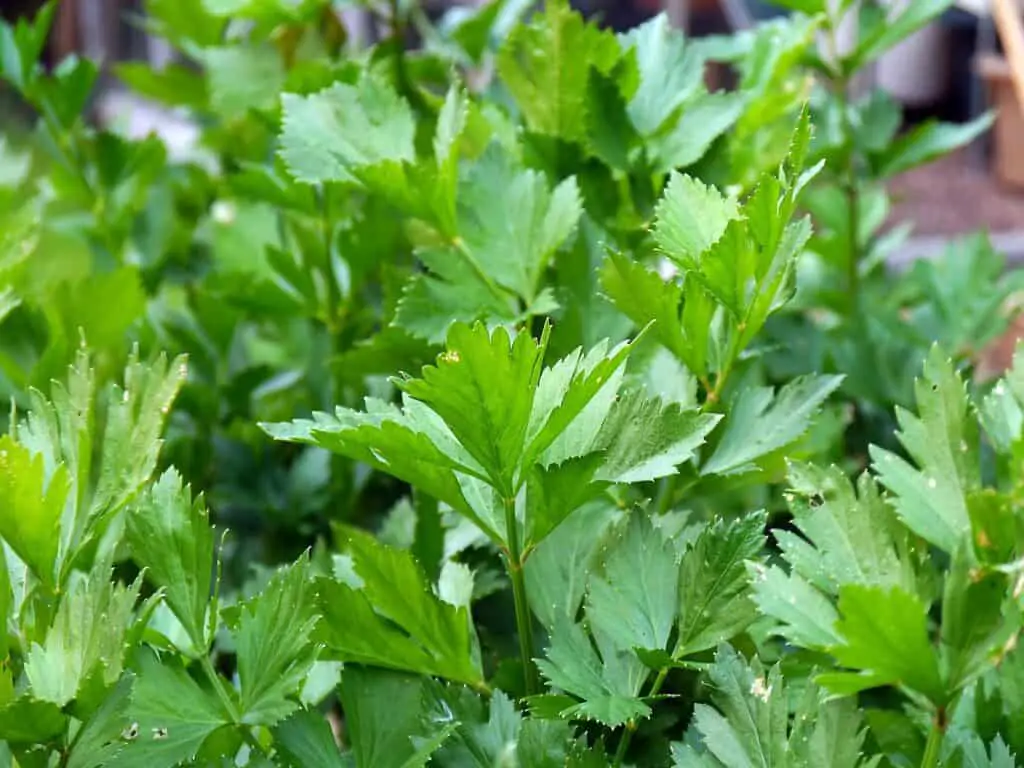
Parsley Tastes Like Grass

Moving beyond the olfactory senses, parsley’s taste has also raised eyebrows, with some describing it as akin to the flavor of grass. This peculiar association may stem from the herb’s vibrant green appearance and its botanical roots. Parsley belongs to the Apiaceae family, which includes carrots, celery, and fennel, among others. The earthy, slightly bitter taste of parsley may be reminiscent of the outdoors, contributing to the perception that it tastes like grass. Exploring this facet of parsley’s flavor profile invites us to appreciate the diversity of taste experiences in the culinary realm.

Parsley Tastes Bad

While parsley enjoys widespread use in various culinary traditions, not everyone appreciates its taste. Some find parsley to be less than appealing, describing it as having a distinctly “bad” taste. This divergence in taste preferences adds an interesting layer to the herb’s culinary journey. Exploring the reasons behind this perceived unpleasantness provides insights into individual palates and the complex interplay of flavors in our culinary encounters.

FAQ

Why does parsley taste like fish?

Parsley’s occasional association with a fishy taste may be attributed to certain compounds within the herb, such as methyl salicylate, which can impart a hint of aquatic notes. Additionally, individual taste sensitivities play a role in how parsley is perceived.

Can parsley be used as a substitute for soap?

Parsley should not be used as a substitute for soap. While it may possess a soapy scent, it lacks the cleansing properties required for effective hygiene. Stick to traditional soap for cleanliness.

parsley, leaves, water-498614.jpg

Why Does Parsley Taste Like Fish

The intriguing phenomenon of parsley occasionally tasting like fish has puzzled many culinary enthusiasts. This unexpected flavor association may stem from the presence of certain compounds within the herb, such as methyl salicylate. These compounds can impart a faintly aquatic or fishy note to parsley. Additionally, individual taste sensitivities play a crucial role in how we perceive flavors. For some, the combination of parsley’s natural compounds and their taste preferences may result in an unexpected resemblance to fish. Understanding this unique aspect of parsley’s taste broadens our appreciation for the complexity of flavors in the culinary world.

Conclusion

In the world of culinary exploration, parsley stands out as a herb with diverse sensory characteristics. From its soapy scent to the grassy taste and occasional divisive flavor, parsley continues to captivate our senses. Whether you’re a fan of its fresh and vibrant presence or find its taste less palatable, the journey through parsley’s aromatic and gustatory landscape is undeniably intriguing. As we continue to unravel the mysteries of this culinary herb, one thing remains certain – parsley’s role in the kitchen is far from mundane.

How To Tell If Parsley Is Bad

Home » parsley plant

Parsley is a popular herb used in soups, stews, salads, and other dishes. It is usually used as a garnish or an ingredient in recipes. Although parsley is known for its distinct and refreshing flavor, it can be challenging to know if it has gone bad. In this blog post, we discuss how to check if your parsley has gone bad or spoiled. We will cover the shelf life of parsley, signs of bad parsley, and tips on how to store parsley.

What is Parsley and How Long Does It Last?

Parsley is an herb widely used in cooking and gardening. It is known for its curly or flat leaves and is commonly used as a garnish in a variety of cuisines. Parsley has a distinctive flavor that enhances the taste of many dishes. Parsley is a delicate herb that can quickly go bad if not stored properly.

Understanding the Shelf Life of Parsley

The shelf life of parsley depends on how it is stored. Fresh parsley leaves can last up to two weeks if they are stored in the refrigerator in plastic bags. Dried parsley has a longer shelf life, and it can last for six to twelve months if kept in a cool, dry place and in an airtight container.

Signs of Bad Parsley

It is essential to check your parsley before use, to know if it is fresh or has gone bad. Here is a checklist to help you identify fresh and spoiled parsley.

A Checklist for Identifying Fresh and Spoiled Parsley.

1. Smell: A fresh parsley has an earthy aroma, and bad parsley smells rancid or musty.

2. Color: Fresh parsley has bright green leaves, and bad parsley may have brown or yellow leaves.

3. Texture: Fresh parsley has crisp leaves, while bad parsley has wilted or slimy leaves.

4. Taste: Fresh parsley has a distinct refreshing taste, and bad parsley may have a bitter or unpleasant taste.

How to Store Parsley

Storing parsley properly can prolong its shelf life. Here are some tips for extending the life of your parsley.

Tips for Extending the Life of Your Parsley

1. Discard bad leaves: Remove any bad parsley leaves before storing them.

2. Dry the leaves: Dry your parsley leaves before storing them to avoid moisture.

3. Use a plastic bag: Place the dry parsley in a plastic bag and seal it tightly to prevent moisture.

4. Refrigerate: Keep your parsley bag in the refrigerator’s crisper drawer to prolong its shelf life.

5. Freeze: Chop fresh parsley leaves and freeze them in ice cube trays to use later.

Conclusion

Knowing how to tell if your parsley has gone bad is important for your health and the quality of your recipes. Using bad parsley in your dishes can ruin the taste and, in some cases, cause food poisoning. Checking for signs of spoilage, understanding the shelf life of parsley, and storing parsley properly can help keep it fresh longer. Follow the tips and checklist in this article to help you enjoy fresh parsley in your recipes for a long time.

How Cold Can Parsley Tolerate

Home » parsley plant

As winter approaches, it becomes challenging to keep your garden plants healthy and alive during cold temperature drops. One of the plants that are highly affected by the cold weather is parsley. Parsley plants are sensitive to frigid temperatures and can wilt, turn yellow, or even die if not well taken care of during the winter. In this blog post, we will provide some tips and tricks to help you keep your parsley plants alive during the winter.

Understanding the Ideal Temperature Range for Parsley

For parsley plants to thrive, they require the ideal temperature range to grow well. Parsley prefers temperatures ranging between 50 and 70 degrees Fahrenheit. Anything below the above temperature range will lead to poor growth and wilted leaves. When winter sets in, the temperature dips below 50 degrees F, leading to difficulty in keeping your parsley plants alive. However, there are various ways to protect your parsley plants, even as the temperature drops.

Tips for Protecting Your Parsley Plants

There are several ways to protect your parsley plants during the cold winter season. Here are some tips to keep your parsley plants alive:

Covering Your Plants with Protective Material

Covering your parsley plants with protective materials is one of the effective ways to keep them warm during the winter season. We suggest using frost blankets or row covers to create a barrier between your plants and the cold temperature. The protective material helps retain warm air and prevents your parsley plants from freezing. You can also use newspapers or cardboard boxes to create a barrier. Ensure you do not press the materials against the leaves; this could lead to breakage.

Using Heat Lamps to Keep Your Plants Warm

Another way to keep your parsley plants warm during the winter season is by using heat lamps. Place the heat lamps a few feet away from your parsley plants to avoid overheating. You can also use a thermostat to regulate the temperature. Combine heat lamps with a protective cover and water your parsley plants according to the need.

Taking Care of Your Parsley Plants in Chilly Weather

To keep your parsley plants thriving during the winter season, you need to ensure that they get enough water, light, and air. Below are some tips for taking care of your parsley plants during chilly weather:

Watering Techniques to Keep Your Parsley Alive and Well

Watering your parsley plants adequately is essential during the winter season to avoid dehydration. However, too much water can cause your parsley to wither or even die. Ensure that the parsley soil is moist but not waterlogged. You can check the soil moisture level by poking your finger to an inch into the soil. if the soil feels damp to touch lower watering or else increase it.

Providing Sufficient Light

Parsley plants require adequate light to grow well, even during winter. Place them in a location that gets at least 6 hours of direct sunlight. If natural sunlight is not sufficient, consider using grow lights to boost the growth of your parsley plants.

Providing Enough Air Circulation

Airflow is crucial to your parsley plants’ health during the winter season. Lack of airflow can cause pest infestation and wilting of your plants. Avoid crowding your parsley plants as this can prevent airflow. Ensure the spacing is adequate to allow more ventilation. Finally, ensure your plants get ample air circulation.

Conclusion

In conclusion, keeping your parsley plants alive during cold temperature drops is achievable with a little extra effort. We hope the tips we have shared have been helpful to you. Parsley is a flavor addition to your diet and spending extra effort on taking care of them will ensure you will enjoy fresh, tasty parsley all winter. What’s your go-to tip for keeping your parsley plants alive during the cold winter? Let us know in the comments below!

When Is Parsley Ready To Harvest

Home » parsley plant

Growing your own herbs at home can be both a satisfying and rewarding experience. Parsley is one of the most commonly grown herbs, and with its versatile flavor and various health benefits, it is not hard to see why. Parsley is a biennial plant that can be grown throughout the year, in pots or in gardens, and requires little care. However, knowing how to determine when your parsley is ready to be harvested is essential if you want to enjoy its full potential. In this article, we will guide you through the process.

Why is timing important when harvesting parsley?

2.1 Understanding the growth cycle of parsley.

Parsley is a biennial plant, meaning it has a two-year life cycle. During the first year, parsley forms a rosette of leaves. In the second year, it sends up a flower stalk and eventually produces seeds and dies. Parsley typically flowers in the spring or early summer of its second year. Hence, it is best to harvest parsley in the first year before it flowers.

2.2 The optimal time to harvest parsley.

The best time to harvest parsley is when it has grown enough leaves to provide a useful yield, and before the plant starts to develop a flower stalk. Typically, parsley takes about 70-90 days to mature from the time the seeds are sown. Harvesting the leaves regularly will encourage new growth and ensure that the plant keeps producing more leaves throughout the growing season.

How to check if your parsley is ready to be harvested

3.1 Observing the appearance of the parsley leaves.

The appearance and color of parsley leaves can help determine if they are ready to be harvested. Generally, the leaves should be dark green and broad. The color and appearance of young leaves vary from mature leaves, with the former being lighter green, flatter, and slightly smaller. Young leaves can also have a milder flavor than the mature ones.

3.2 Smell and texture as indicators of readiness.

The smell and texture of parsley leaves also contribute to its readiness for harvesting. Parsley leaves that are ready for harvest have a strong smell, indicating their essential oil content. They are also firm to the touch, with no signs of wilting. Leaves that are yellowing, wilting, or brown indicate that they are past their prime and should be harvested promptly.

Techniques for harvesting parsley without damaging the plant.

4.1 Using shears or scissors to snip the leaves.

The best way to harvest parsley is by using scissors or shears to cut the stem. Cut only the outer leaves of the plant, leaving the center ones untouched. Always use sharp and clean tools to avoid damaging the plant. When harvesting parsley leaves, cut the stem to the desired length, usually up to an inch above the soil level, so that the plant can keep producing.

4.2 Removing only a portion of the plant at a time.

It is important not to over-harvest your parsley as it can stress the plant and lead to reduced yields over time. Instead, you can harvest 1-2 leaves from each stem, selectively snipping them, and leaving the rest of the plant untouched. This method will help to increase the plant’s lifespan and ensure that you have a steady harvest for many months.

Common mistakes to avoid when harvesting parsley.

5.1 Harvesting too often.

Harvesting parsley too often stresses the plant and reduces the yield. It also affects the quality of the plant. To avoid this, you should harvest parsley after it has grown enough leaves to produce a useful yield, and before it starts to develop a flower stalk.

5.2 Neglecting to water the plant.

Parsley needs to be watered consistently to grow healthily and produce a high yield. Neglecting to water the plant will cause it to wilt and reduce the quality of the leaves. It is advisable to water the plant once or twice a week, depending on the season.

5.3 Leaving old leaves on the plant.

Leaving old leaves on the parsley plant can reduce the quality and quantity of the new growth. Remove old leaves regularly so that the plant can channel its energy toward growing fresh leaves.

Storing harvested parsley.

6.1 Keeping parsley fresh.

To keep harvested parsley fresh, place the leaves in a jar with about an inch of water. Cover the leaves with a plastic bag and store it in the refrigerator for up to a week. You can also chop the leaves finely, mix it with a little water, and freeze it for later use.

6.2 Drying parsley leaves.

Drying parsley leaves is another way of preserving them for future use. Tie the parsley bunches and hang them in a dry, ventilated space. Once dry, remove the leaves from the stalk, and store them in an airtight container away from direct sunlight.

How to use harvested parsley

7.1 Culinary uses.

Parsley is an incredibly versatile herb and can be used in various dishes. It is an essential ingredient in Mediterranean cuisines, commonly used in tabbouleh, salads, soups, and stews. It also pairs well with seafood, poultry, and meat dishes.

7.2 Medicinal benefits.

Apart from its culinary uses, parsley is also known for its medicinal benefits. It is rich in essential vitamins and minerals, including Vitamins A, C, and K, and has anti-inflammatory and antioxidant properties. Parsley tea is said to help with digestive issues, while its essential oil can be used to alleviate joint pain.

Conclusion

Harvesting parsley is an essential aspect of growing this biennial plant. By harvesting the leaves at the right time and avoiding common mistakes, you can ensure a bountiful harvest that provides you with a versatile herb for cooking and potential health benefits. By following the guidelines given in this article, you will be well-equipped to determine when your parsley is ready to be harvested, how to harvest it, and how to use and store it.

What Not To Plant With Parsley

Home » parsley plant

Parsley is a staple herb in many kitchens around the world. It has a unique flavor and aroma that can enhance the taste of various dishes. Besides, it is valued for its nutritional benefits as it is rich in vitamins and minerals. However, growing parsley can be challenging as it requires careful planning, especially when it comes to companion planting. In this blog post, we will discuss the plants you should avoid planting with parsley, and the alternatives to ensure a successful parsley garden.

Why Planting with Parsley Requires Careful Planning

2.1 Importance of Parsley as a Culinary Herb

Parsley is one of the most used herbs in culinary preparations globally, and it’s a staple ingredient in a wide range of dishes, including soups, stews, salads, and sauces. However, parsley is not only an excellent ingredient but also a potent herb with many medicinal properties. It helps in reducing inflammation, soothe upset stomachs, and maintain healthy digestion and immunity.

2.2 Companion Planting for Improved Yield and Quality

Companion planting is a gardening technique where plants that have a positive effect on each other’s growth and development are grown together. Certain plants have natural properties that can benefit the growth and yield of other plants. For instance, some plants can help to repel pests and diseases, provide a natural shade, or improve soil quality. Companion planting can also help reduce soil erosion and balance the soil’s nutrient content.

Parsley’s Incompatibility with Certain Plants

3.1 Negative Effects of Incompatible Planting

As much as companion planting can help improve parsley’s growth and yield, planting with certain types of plants can be detrimental to parsley’s growth and yield. This is because certain plants are incompatible with parsley and can lead to poor crop yield, weak growth, and increased pest and disease incidence. Incompatibility between plants can also occur if they have different soil, shade, water, or nutrient requirements.

3.2 Examples of Plants That Should Not Be Planted with Parsley

Some plants should not be grown alongside parsley. Examples include members of the Apiaceae family, which includes fennel, coriander, and dill. These plants release biochemicals that are harmful to parsley and can lead to stunted growth and poor crop yield. Additional plants that should be avoided include mint, sage, and oregano, which can also compete with parsley for nutrients and water.

Subsection 4. Alternatives to Incompatible Plants for Parsley Companion Planting.

4.1 Plants that Favorably Interact with Parsley

While some plants will hamper parsley’s growth and yield, several herbs and vegetables thrive around and provide benefits to parsley. For example, garlic and onions can repel pests that may attack parsley. Spinach and lettuce can provide shade and improve soil quality. Tomatoes have disease-fighting properties that can benefit parsley, while chamomile and marigold create an attractive environment that attracts pollinators.

4.2 Benefits of Companion Planting with Parsley

Companion planting with parsley provides numerous benefits, including improved soil quality, increased crop yield, and better pest and disease resistance. Parsley also acts as an excellent cover crop and companion plant for crops such as tomatoes, peppers, and eggplants. Additionally, companion planting can help promote the growth of beneficial insects that help control pests and encourage pollination.

Tips for Successful Parsley Companion Planting

5.1 Soil Preparation and Maintenance

For successful companion planting with parsley, proper soil preparation and maintenance are crucial. Ensure that the soil is well-drained, fertile, and has a neutral pH of 6.5 to 7.5. Add compost or well-rotted manure to improve soil quality and provide essential nutrients for growth.

5.2 Nutrient Requirements for Parsley and Companion Plants

Parsley requires sufficient sunlight, water, and nutrients to grow optimally. Ensure that you provide enough water, especially during dry periods, and add compost to the soil to ensure that the parsley and the companion plants have enough nutrients to grow. Also, remember to prune or remove some companion plants that are competing for water and nutrients to allow parsley to grow efficiently.

Conclusion

Growing parsley can be a rewarding experience, provided that it’s well-planned and companion planting is carefully considered. As we have seen, planting certain plants alongside parsley can have adverse effects on parsley quality and yield. However, with proper planning and knowledge of which plants to grow with parsley and which to avoid, you can enjoy a flourishing herb garden with abundant parsley.

How Many Parsley Seeds Per Pot

Home » parsley plant

Growing parsley is a popular hobby among gardeners and plant enthusiasts alike. In addition to being a herb used in various dishes, parsley is also an excellent source of antioxidants and vitamins A and C. To achieve maximum yield of parsley, gardeners must choose the appropriate number of parsley seeds for each pot, which can be a challenging task. In this article, we will provide an overview of how to determine the optimal number of parsley seeds per pot and the factors that influence the growth of parsley plants.

The Importance of Choosing the Right Number of Seeds for Your Parsley Pots.

Determining the optimal amount of parsley seeds for each pot is crucial for the healthy growth of parsley plants. Seed count affects the germination rate, spacing, and root growth of parsley plants. Without proper spacing and adequate nutrients, plants do not grow optimally, resulting in stunted growth, low yield, and wasted seeds. Therefore, it is essential to determine the optimal seed count that is suitable for the pot and parsley variety.

Factors That Influence the Number of Seeds Needed.

Several factors influence the number of parsley seeds needed per pot. These include the size of the pot, species of parsley, planting method, and environmental conditions such as climate, temperature, humidity, and sunlight. A smaller pot requires fewer seeds, while a larger pot may need more seeds to fill the space appropriately. Species of parsley vary in growth habit and spacing, affecting the number of seeds needed per pot. For instance, curly parsley has a bushy growth habit and may require more seeds than Italian parsley, which is taller and more upright.

How to Calculate the Optimal Number of Seeds per Pot

Determining the optimal number of parsley seeds per pot involves a few simple calculations, which depend on the size of the pot, parsley variety, and spacing. Here’s how you can calculate the optimal seed count for various pot sizes.

Understanding the Size of the Pot and Parsley Variety.

Before planting parsley seeds, it is crucial to understand the size of the pot and the parsley variety to determine the optimal seed count. If you are using a small pot, it is recommended to start with three seeds at a distance of 2cm apart, while for a larger pot, it is advisable to start with five to seven seeds. The parsley variety also affects the seed count, depending on the growth habit and foliage density. For parsley species that have a bushy growth habit such as curly parsley, it is recommended to plant more seeds in a pot to accommodate the foliage’s volume.

Determining the Optimal Spacing and Seed Density.

Once you have determined the pot size and parsley variety, you can calculate the optimal seed density and spacing. A common guideline for seed spacing is to plant parsley seeds at a distance of 2cm apart. However, if you prefer parsley with denser foliage, you can plant seeds closer together, at a distance of 1cm or less. For instance, if you are using a small pot and planting curly parsley, you may want to start with four seeds, spacing them 1 cm apart. Conversely, if you are using a larger pot and planting Italian parsley, you may begin with seven seeds and space them 2 cm apart.

Tips for Maximizing Your Parsley Yield with the Optimal Seed Count

To maximize the yield of parsley plants, it is essential to provide the optimal growing conditions and maintain the parsley plants’ health. Here are some tips that can help you achieve the best results with the right seed count.

Providing Proper Lighting, Watering, and Fertilization.

Parsley plants require ample sunlight, moisture, and nutrients to grow optimally. Ensure that the pot is placed in a location that receives at least six hours of sunlight daily. Water parsley plants regularly, but avoid oversaturating the soil, which can lead to root rot and stunted growth. Fertilize parsley plants with organic matter, such as compost or aged manure, every three to four weeks.

Pruning and Harvesting Strategies for Maximum Parsley Production.

Parsley plants are known for their ability to grow back after cutting, making them ideal for repeated harvests. For maximum yield, prune parsley plants periodically by removing the outer leaves and stems, leaving the central stalk intact. Harvest parsley when the leaves are mature, but before the plant starts to flower. Cutting parsley leaves regularly encourages the plant to produce new leaves and enhances foliage volume.

Conclusion

In conclusion, determining the right number of parsley seeds for your pot can be a tricky process. However, with the proper knowledge of your pot size, parsley variety, and spacing, you can ensure optimal growth and maximum yield of parsley plants. Providing the right growing conditions, such as ample sunlight, moisture, and nutrients, can also enhance parsley growth and production. With these tips, you can enjoy fresh and healthy parsley plants all year round.

How To Store Italian Parsley

Home » parsley plant

Italian parsley is a common herb used in cooking to add flavor and nutrition to various dishes. Parsley is rich in vitamins A, C, and K, along with several minerals like iron and potassium. It is also considered a natural breath freshener, making it a great addition to your diet. However, like other herbs, parsley doesn’t stay fresh for long. This blog will discuss the best ways to store Italian parsley to keep it fresh for a longer period.

Why Store Italian Parsley

Parsley is an herb that is often purchased in large quantities but used in small quantities during cooking. Many people struggle to use it all before it turns brown and wilted, leading to waste. Parsley has several health and nutritional benefits, and it is essential to keep it fresh to achieve those benefits.

Benefits of Fresh Parsley

Consuming fresh parsley has several benefits, including:

– Boosting Immunity: Parsley’s high vitamin C content helps boost the immune system, making it healthier.

– Anti-inflammatory Properties: Parsley contains flavonoids like apigenin, which have anti-inflammatory properties that can reduce inflammation in the body.

– Digestive Aid: Parsley is rich in dietary fiber, which can help maintain a healthy digestive system.

– Fresh Breath: Parsley’s chlorophyll content helps combat bad breath by neutralizing odor-causing compounds.

How to Choose and Prepare Your Parsley for Storage

When selecting parsley, look for plants with crisp, firm leaves free of bruising or dark spots. Choose bright green leaves over yellow or wilted ones, as wilting is a sign of spoilage. Smell the parsley: it should have a fresh, herbaceous aroma.

Choosing an Appropriate Storage Container

Parsley can be stored in several types of containers, including plastic or glass containers with lids, or green bags designed to keep herbs fresh for a more extended period. The type of container you choose should be airtight to prevent air from circulating and drying the parsley. It’s best to avoid storing parsley in plastic bags, as they don’t provide sufficient airflow around the leaves.

Preparing Parsley for Storage

Before storing parsley, remove any tags or rubber bands attached to the bunch—the bands can cause the leaves to bruise over time. Wash the parsley with cold water and shake it to remove excess water. You can also pat dry the leaves with a clean towel to remove any remaining moisture.

Best Ways to Store Italian Parsley

Refrigerating parsley is one of the most reliable ways to keep it fresh. To store parsley in the refrigerator, wrap it in a damp paper towel to keep it moist, then place it in an airtight container, such as a plastic bag or glass jar. You can store the parsley in the vegetable crisper or on the refrigerator shelf. Parsley can last for up to two weeks when stored properly in the refrigerator.

Freezing Parsley Tips

Parsley can also be frozen to extend its shelf life. To freeze parsley, wash and chop it into small pieces before placing it in a freezer-safe container or bag. Seal the container or bag and freeze. Parsley can last up to six months when frozen.

Drying Parsley Methods

Drying parsley is another excellent way to preserve it. To dry parsley, wash and dry the leaves thoroughly and remove any stems. Arrange the parsley leaves in a single layer on a baking sheet and place the sheet in a dry, dark place. Allow the parsley to dry for several days or until it is entirely dry and brittle. Once dried, store the parsley in an airtight container. Dried parsley can last for several months.

Conclusion

In conclusion, parsley is an herb that adds flavor and nutrition to various dishes. It’s essential to keep it fresh to get the maximum nutritional benefit and avoid waste. When storing parsley, choose the appropriate container, prepare it adequately, and use one of the storage methods mentioned above to extend its shelf life. By following these steps, you can enjoy fresh parsley in your dishes for an extended period.

What Is Curly Parsley

Home » parsley plant

Curly parsley, scientifically known as Petroselinum crispum var. crispum, is a popular culinary herb known for its distinctive curly leaves and fresh, grassy flavor. This herb is commonly used in a wide range of dishes, including salads, soups, stews, sauces, and more.

If you are looking to grow curly parsley at home, this guide offers tips and tricks to help you achieve a bountiful harvest. Whether you are a seasoned gardener or a beginner, you can use these strategies to cultivate a healthy supply of this versatile and flavorful herb.

Understanding the unique qualities of curly parsley.

Curly parsley differs from flat-leaf parsley in that it has tighter, more compact leaves that are ruffled and curled. The leaves of curly parsley tend to be more delicate and frilly than those of flat-leaf parsley, and many people appreciate the way these leaves add texture and visual interest to dishes.

Curly parsley has a slightly milder flavor than flat-leaf parsley, but it is still considered to be a staple herb in many kitchens around the world.

How curly parsley differs from flat-leaf parsley

While both curly parsley and flat-leaf parsley belong to the same family of herbs, there are some notable differences between the two. One of the most obvious is the appearance, as curly parsley has more curled leaves than flat-leaf parsley. Additionally, curly parsley has a milder flavor than flat-leaf parsley, making it a good choice for those who prefer a less pronounced herb taste.

When it comes to cooking, curly parsley is generally used as a garnish or for adding additional flavor to dishes, while flat-leaf parsley is often used as a primary ingredient for adding depth of flavor.

The basics of growing curly parsley.

Whether you are planting curly parsley in containers or in the ground, there are some basic steps you can follow to ensure success. Use the following steps as a starting point for growing your own curly parsley:

Choosing the right location and soil for curly parsley.

Choose a location for your curly parsley that receives full or partial sunlight. While parsley can tolerate some shade, it will do better in areas with plenty of sunshine. Additionally, curly parsley prefers well-draining soil that is rich in organic matter. Add compost or other organic material to the soil if it is heavy or clay-like, and ensure that the soil is moist but not waterlogged.

How to plant curly parsley seeds or seedlings.

You can plant curly parsley from seeds or seedlings, depending on your preference. If you opt for seeds, sow them in the ground about 1/4 inch deep in rows that are about 12 inches apart. Keep the soil moist and wait for the seeds to germinate, which should take about 2-3 weeks.

If you prefer seedlings, you can purchase them from a garden center or start them indoors about 6-8 weeks before the last expected frost. Plant the seedlings in the ground about 8 inches apart, being careful to not bury the stems. Cover the roots with soil and keep the soil moist.

Essential care and maintenance for healthy curly parsley.

After planting your curly parsley, it is important to maintain its health by providing proper care and maintenance. Use the following tips to ensure your plants stay healthy and robust:

Watering, fertilizing, and pruning tips for curly parsley.

Water curly parsley regularly, but be careful not to overwater as this can lead to root rot. Allow the soil to dry out slightly between waterings, and do not allow water to pool around the base of the plant.

Fertilize your curly parsley with a balanced plant food about once a month during the growing season. You can also add compost or other organic material to the soil to help nourish the plants.

Prune curly parsley regularly to encourage bushy growth and prevent it from becoming too leggy. Simply trim off any yellow or brown leaves, or clip the stems back to about 2-3 inches above the soil line.

Common pests and diseases that can affect curly parsley and how to prevent them.

Curly parsley is susceptible to a few common pests and diseases, including aphids, slugs, and fungal infections. To prevent these problems, inspect your plants regularly and remove any affected leaves or parts of the plants.

You can also use natural remedies like neem oil or insecticidal soap to discourage pests from infesting your curly parsley. Additionally, ensure that your plants have adequate air circulation and are not overcrowded, as this can lead to fungal infections.

Conclusion

Curly parsley is a flavorful and versatile herb that can enhance the taste and appearance of a wide range of dishes. By following the tips and tricks outlined in this guide, you can grow your own bountiful supply of curly parsley at home.

Remember to choose the right location and soil, plant your seeds or seedlings correctly, and provide proper care and maintenance to keep your curly parsley plants healthy and robust. With a little patience and hard work, you can enjoy fresh, delicious curly parsley all season long.

How To Grow Parsley From Cuttings

Home » parsley plant

Parsley is one of the most popular herbs in the world, used in a variety of cuisines to add flavor and color to dishes. While it’s commonly grown from seeds, it’s possible to propagate parsley from cuttings as well. This method allows you to produce new plants that are genetically identical to the original plant and can be a great way to expand your herb garden without having to buy new seeds. In this step-by-step guide, we’ll walk you through everything you need to know to grow parsley from cuttings yourself, even if you’re a beginner.

Why Grow Parsley from Cuttings

2.1 Benefits of Growing Parsley from Cuttings

One of the main benefits of growing parsley from cuttings is that it’s an incredibly quick and simple process. Moreover, you can be confident that the new plants will have the same characteristics as the plant they were taken from, so you know exactly what you’re getting. Additionally, growing parsley from cuttings can save you money in the long run, as you’ll have an ongoing supply of fresh parsley that you don’t have to buy from a store.

Gathering the Materials

3.1 What You Need for Your Cuttings

To grow parsley from cuttings, you’ll only need a few materials: a sharp pair of scissors or pruners, a small container, sterile potting soil, and rooting hormone. Rooting hormone is optional, but it can be very helpful in encouraging roots to form.

Preparing the Cuttings

4.1 How to Select Healthy Parsley Cuttings

The key to successfully growing parsley from cuttings is to choose healthily, young stems to propagate. Look for stems with several sets of leaves, as this will give your new plant an established leaf structure to continue growing.

4.2 Practical Tips for Preparing Parsley Cuttings

Once you’ve identified the stems you want to propagate, use a sharp pair of scissors or pruners to cut a stem that is at least three inches long. You can then remove the lower leaves (leaving two or three sets of leaves at the top). Next, dip the cut end of the stem into rooting hormone, if you choose to use it.

Planting the Cuttings

5.1 Choosing the Right Location to Plant

The next step is to prepare a small container for your cuttings. You can use a pot with drainage holes, or even a plastic cup with holes poked in the bottom. Choose a location that receives plenty of bright, indirect sunlight throughout the day.

5.2 The Best Soil for Your Parsley Cuttings

Fill your container with sterile potting soil, leaving enough space at the top for your cuttings to be planted. The soil should be moist but not overly wet. Once you’ve filled the container, use your finger or a pencil to make a planting hole in the soil.

5.3 How to Plant the Parsley Cuttings the Right Way

Now it’s time to plant your parsley cuttings. Insert the cut end of the stem into the planting hole, ensuring that it goes at least an inch or two into the soil. Firm the soil around the base of the cutting to hold it in place.

Caring for Your Parsley Cuttings

6.1 Watering and Fertilizing Parsley Cuttings

After planting your parsley cuttings, water them well and allow any excess water to drain out of the bottom of the container. Keep the soil consistently moist but not soaking wet. You can also feed your parsley with a liquid fertilizer every two weeks.

6.2 Pests and Diseases to Watch Out For

Like all plants, parsley is susceptible to certain pests and diseases. Look out for aphids, spider mites, and fungal diseases like powdery mildew. If you notice any signs of these issues, treat them accordingly.

Conclusion

7.1 Enjoying Your Homegrown Parsley

With a little love and attention, your parsley cuttings should begin to grow roots and establish themselves in just a few weeks. Eventually, you can transplant them into larger containers or even into your garden. Once your parsley is thriving, you’ll be able to use it in a variety of recipes, from soups and stews to salads and marinades.

7.2 Delicious Recipes to Make with Your Fresh Parsley

Here are a few of our favorite dishes that highlight the flavor and versatility of fresh parsley:

– Classic tabbouleh salad

– Creamy parsley soup

– Chimichurri sauce for grilled meats

– Italian parsley pesto

– Parsley and lemon roasted potatoes

Whether you’re new to gardening or a seasoned pro, growing parsley from cuttings is an easy and rewarding way to cultivate fresh herbs at home. Give it a try and see how it enriches your dishes and your garden alike.

How To Dry Out Parsley

Home » parsley plant

Parsley is one of the most popular herbs used in cooking and it adds a unique flavor and aroma to dishes. However, fresh parsley only lasts for a few days before it starts to wilt and go bad. That’s where dried parsley comes in. Dried parsley not only lasts much longer than fresh parsley, but it also enhances the flavor and aroma of dishes in a way that fresh parsley can’t. In this blog post, we’ll discuss the different methods of drying parsley and provide you with tips on how to do it perfectly every time.

Why Drying Parsley is Important: Health and Culinary Benefits

Drying parsley is important for a number of reasons. Firstly, it helps to preserve the nutritional value of the herb. Parsley is loaded with vitamins A, C and K, as well as iron and folate. When you dry parsley, you retain these nutrients, making it a healthy addition to your meals. Secondly, dried parsley has a more intense flavor than fresh parsley. When you dry parsley, the water content is removed, leaving a more concentrated flavor. This allows you to use less parsley while still achieving the same delicious flavor.

Different Methods for Drying Parsley: Which Works Best

There are two main methods for drying parsley: air-drying and oven-drying. Both methods work well, but the one that’s best for you will depend on your personal preferences and the equipment you have available.

Air-drying: How to Air-dry Parsley Perfectly

Air-drying is the easiest and most traditional method of drying parsley. Here’s how to do it:

1. Wash the parsley: Before drying, wash the parsley under cold running water to remove any dirt or debris.

2. Remove the excess water: Gently shake the parsley to remove any excess water. You want to leave a little bit of moisture on the parsley to help it dry, but not too much.

3. Tie the parsley: Bundle the parsley together and tie it with a string or rubber band.

4. Hang the parsley: Hang the bundle of parsley upside down in a warm, well-ventilated area. Make sure it’s not in direct sunlight, as this can cause the parsley to lose its flavor.

5. Wait for the parsley to dry: It should take around 1-2 weeks for the parsley to dry completely. Once it’s dry, remove the leaves from the stems and store them in an airtight container.

Oven-drying: Step-by-Step Guide for Oven-drying Parsley

If you’re short on time, oven-drying is a faster method of drying parsley. Here’s how to do it:

1. Preheat the oven: Preheat your oven to 180°F (82°C).

2. Wash and dry the parsley: Wash the parsley under cold running water and then gently pat it dry with a towel.

3. Place the parsley on a baking sheet: Spread the parsley out on a baking sheet in a single layer. Make sure the leaves aren’t touching each other.

4. Bake the parsley: Slide the baking sheet into the preheated oven and let it bake for around 2-4 hours. Check on the parsley every hour or so, and remove any pieces that are dry and crispy.

5. Store the parsley: Once the parsley is completely dry, remove the leaves from the stems and store them in an airtight container.

How to Store Dried Parsley for Longevity

Once you’ve dried your parsley, it’s important to store it properly to keep it fresh and flavorful for as long as possible. Here are some tips for storing dried parsley:

1. Use airtight containers: Store the dried parsley in an airtight container to prevent it from absorbing moisture and losing its flavor.

2. Label the container: It’s a good idea to label the container with the date you dried the parsley. This will help you keep track of when it’s time to replace it.

3. Store in a cool, dry place: Keep the container of dried parsley in a cool, dry place that’s away from direct sunlight. A pantry or cupboard is a great place to store it.

4. Don’t crush the parsley: Avoid crushing the dried parsley until you’re ready to use it. This will help to preserve its flavor and aroma.

Conclusion

Drying parsley isn’t difficult, but it does take some time and patience. Whether you choose to air-dry or oven-dry your parsley, the end result will be a delicious, flavorful herb that you can use in a wide variety of dishes. With these tips, you’ll be able to dry parsley perfectly every time and enjoy the health and culinary benefits of this popular herb.