How To Get Rid Of Brown Spots On Houseplant Leaves

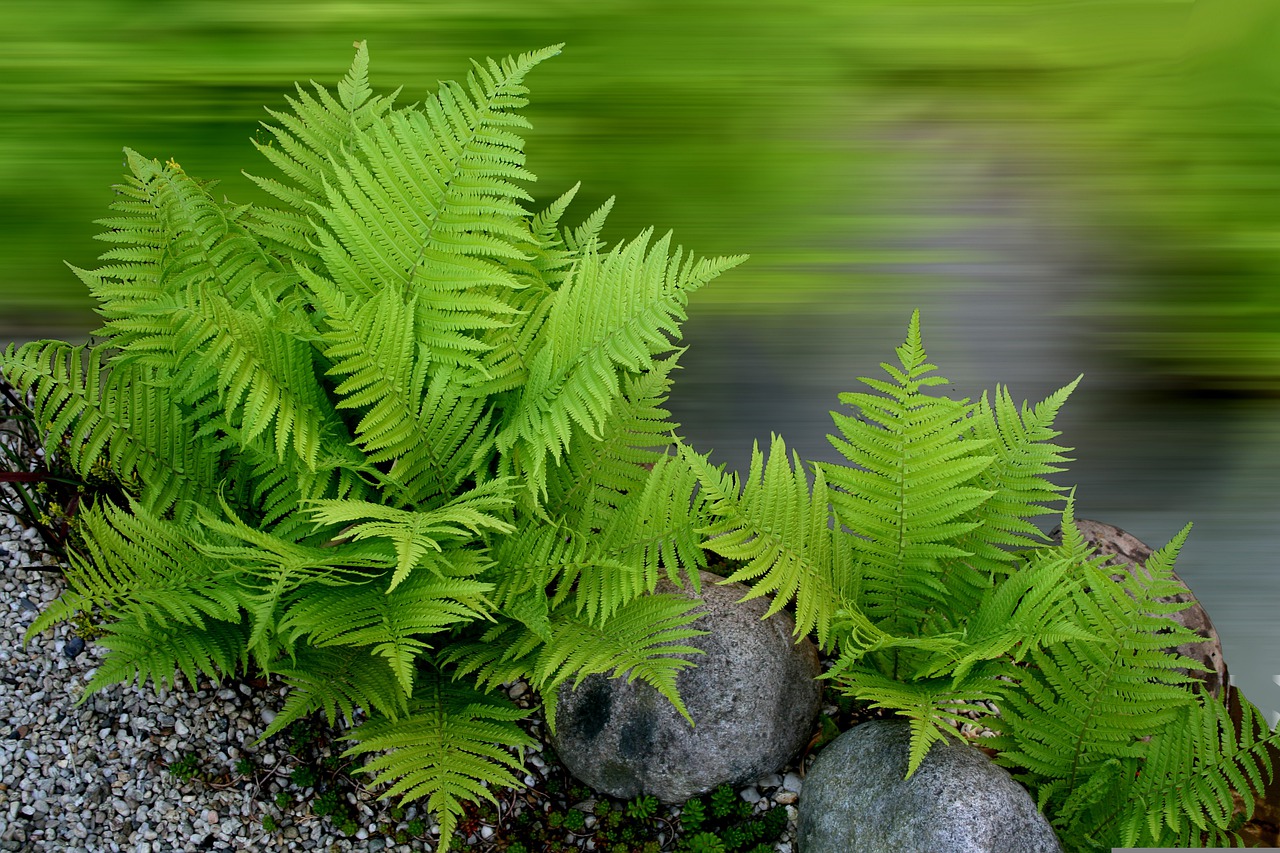
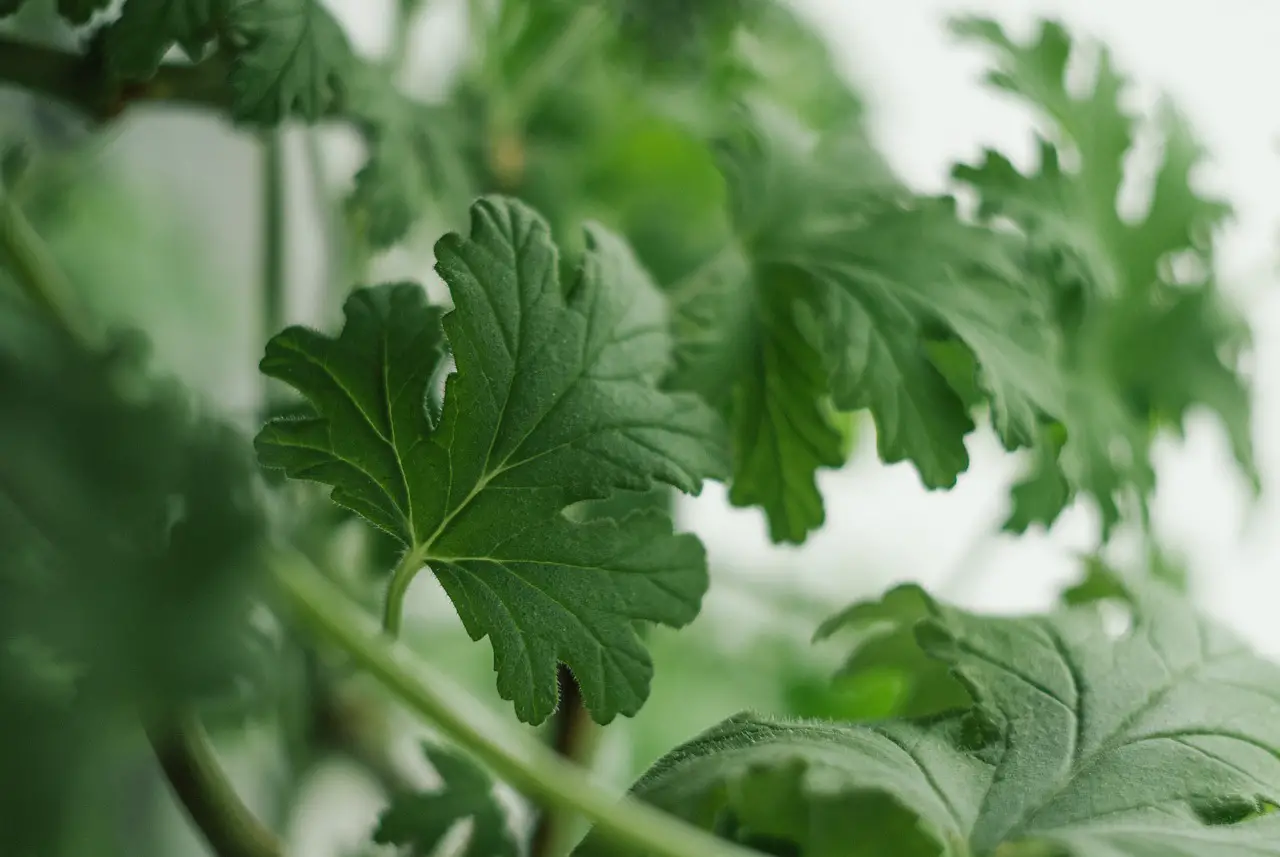
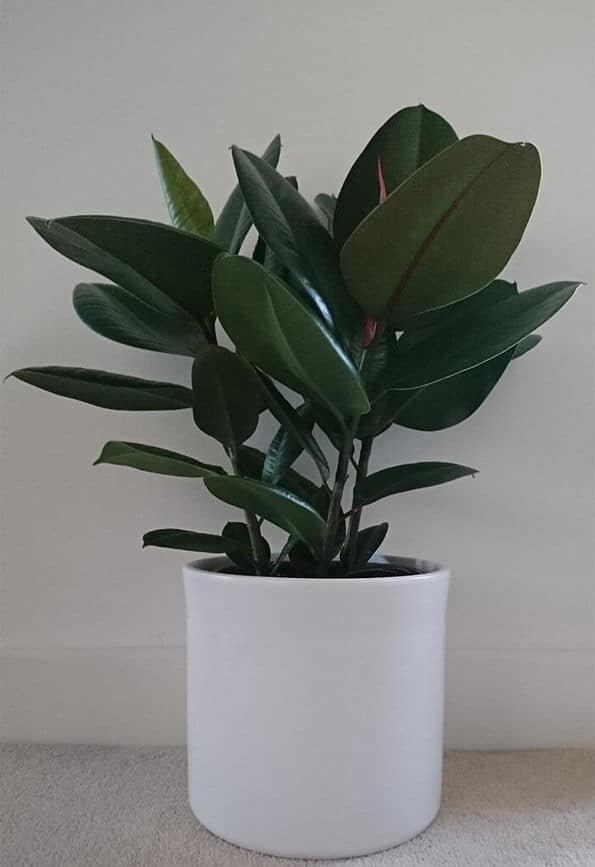
If you’re noticing brown spots on the leaves of your houseplants, don’t worry – there are a few things you can do to get rid of them. In this blog post, we’ll cover what causes brown spots on houseplant leaves, how to get rid of them, and how to prevent them from coming back. One of the most common causes of brown spots on houseplant leaves is too much sun. If your plant is in a spot that gets direct sunlight for more than a few hours a day, the leaves can start to scorch and turn brown. 

The best way to get rid of brown spots caused by sunburn is to move your plant to a spot that gets less direct sunlight. If you can’t do that, try covering the leaves with a sheer curtain or piece of fabric to filter out some of the sun’s rays. Another common cause of brown spots on houseplant leaves is pests. If you see small, brown dots on the leaves of your plant, it’s likely that aphids or scale insects are to blame. 

These pests suck the sap out of the leaves, causing them to turn brown and eventually die. To get rid of pests, start by spraying your plant with water to dislodge them. Then, apply an insecticidal soap or neem oil to the leaves, being sure to reach the undersides where the pests are hiding.

Why do brown spots appear on houseplant leaves?

Alternaria is a type of fungus that commonly affects houseplants. The fungus thrives in moist environments, and can cause brown spots to form on the leaves of affected plants. There are a few things that you can do to help prevent Alternaria from affecting your houseplants. First, make sure that you are not overwatering your plants. Second, keep your plants in a well-ventilated area to help reduce the level of humidity. Finally, make sure to remove any dead or dying leaves from your plants, as these can provide a source of food for the fungus.

This disease is often caused by too much moisture on the leaves.

Too much moisture on the leaves of a houseplant can create an ideal environment for the Alternaria fungus to thrive. When the fungus comes into contact with damp leaves, it can cause brown spots to form.

How can you get rid of brown spots on houseplant leaves?

Treat the plant with a fungicide.Make sure the plant gets enough light and air circulation.

If you notice brown spots appearing on the leaves of your houseplants, there are a few things you can do to get rid of them. First, remove all of the affected leaves from the plant. This will help to prevent the spread of the disease to other parts of the plant. Next, treat the plant with a fungicide specifically designed for Alternaria diseases. Be sure to follow the directions on the package carefully. Finally, make sure that your plant is getting enough light and air circulation. Brown spots are often caused by too much moisture, so be sure to water at the base of the plant and keep it in a well-ventilated area.

Preventing brown spots on houseplant leaves.

When watering your houseplants, be sure to water at the base of the plant rather than on the leaves. Watering on the leaves can cause brown spots to form, as this can lead to too much moisture on the leaves.

Keep the plant in a well-ventilated area.

It’s important to keep your houseplants in a well-ventilated area, as this will help to prevent brown spots from forming. Good air circulation will help to dry out any moisture that may be on the leaves, which can prevent the growth of Alternaria (the fungal disease that causes brown spots).

Avoid overcrowding plants.

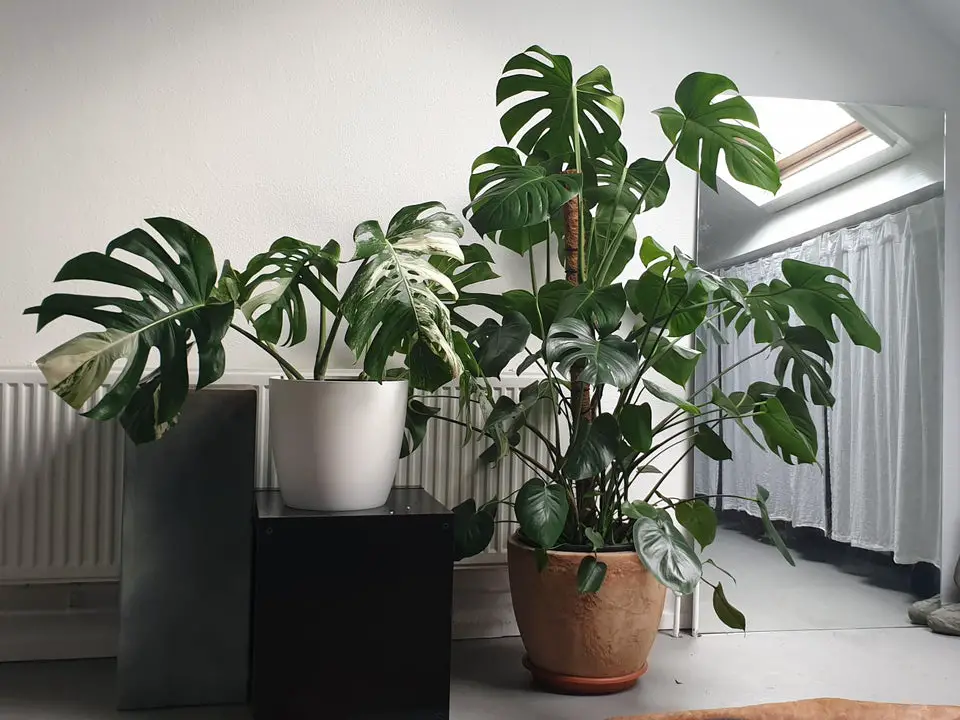
When potting or repotting your houseplants, be sure to avoid overcrowding them. This is because overcrowded plants can cause poor air circulation, which can lead to brown spots forming on the leaves. To avoid overcrowding your plants, be sure to give them enough space to breathe. This means not packing them too tightly together in their pot or planter. Additionally, be sure to check the drainage of your pots and planters to ensure that water can properly flow through and not pool around your plants’ roots.

Conclusion

If you notice brown spots appearing on the leaves of your houseplants, don’t panic. These spots are usually caused by a fungal disease called Alternaria. The good news is that this disease is relatively easy to treat. Simply remove all affected leaves from the plant and treat it with a fungicide. Make sure the plant gets enough light and air circulation, and water at the base to prevent the fungus from coming back.

FAQ

What Causes Brown Spots On Houseplant Leaves

There are a number of reasons why a houseplant might get brown spots on the leaves. But most commonly it’s about overwatering and too much sun. If the soil is like mud it will negatively impact the plant and cause brown spots.

How Do You Treat Brown Spots

Treating a plant with brown spots, and especially houseplants are best done by cutting off the leaves. That way we can promote the growth of the healthy ones and hopefully we won’t see any more brown spots appearing.

Should I Cut Off Leaves With Brown Spots

We think it’s a good idea to in most cases cut off the leaves with brown spots on them. It also depends on how far it has gone. In the beginning it might be better focusing on the soil and the placement of the plant before starting to cut off leaves.

How Often To Water Petunia For Growth

magic bells, petunia, flower-6360683.jpg

What Are Petunias Petunia VarietiesHow Often To Water PetuniaWhen To WaterOverwateringWhat Does Overwatering Look LikePetunia SeedlingsFAQ

Growing a petunia at home has become a hobby for a lot of gardeners in recent years. The plant is easy to grow and will provide you with a lovely decoration in your garden. During the warm summer months then the plant might need more watering then during the winter. But as a good rule of thumb, once a week at least is what we recommend.

Petunia Plant
Petunia Plant

What Are Petunias

Petunias are a very common plant that is gaining more and more popularity. The petunia plant is often grown like an annual plant that will grow the most and look the best during the summer when it’s flowering. Its self seeding, or most varieties are at least. This means you can expect more petunias growing in the same spot next year too.

The size of the petunia plants can vary quite a lot. The smallest ones are usually no more than 6 inches while the tallest are about 18 inches. They are therefore a great plant to grow in front of larger trees or bushes to kind of give a more colorful feeling to your garden.

Petunia Varieties

There are like we said a lot of different varieties of petunias, but you can more or less narrow it down to 5 different ones. 

  • Multiflora (The most durable and hardy varieties of petunias. Smaller but more abundant in flowers compared to other ones.)
  • Grandiflora (Varieties with really large flowers that are best grown in containers. Not very fit for the south because of the high temperatures)
  • Floribundas (Free flowing varieties that are sort of an inbetween of the last two categories of petunias we mentioned)
  • Millifloras (These are the smallest plants but will have flowers during the whole season and are relatively sturdy and hardy too.)
  • Spreading or Trailing Petunias (Small and low growing plants that won’t be taller than about 3 – 4 inches or so.)

As you can see, there are a few different categories of petunias, and within all these categories there are plenty of different varieties.

How Often To Water Petunia

We often follow a rule of watering our petunias at least once a week. That way we can protect the plant against any drought or lack of rain during the warm summer. Note that different varieties of petunias will require different amounts of water. 

The larger plants will of course need more water since they are also using more. If you want to take it to the next level then you should take a close look at the soil after you have watered the soil. If you can see that it’s slightly damp in the texture, then you did a good job.

That’s the ideal climate and environment for the petunia plant to grow in. The plant will have an easier time growing more and more roots. If you are overwatering the soil then there won’t be any oxygen able to reach the roots.That will quickly make them start drowning and eventually this will kill your plant.

When Should You Water Petunia

The best time to water a petunia is in the morning. We follow this because it really fits into our schedule as well. Watering before heading off to work fits perfectly for us. But there are some benefits to doing it this way as well. 

Since it’s during the way the plant will use most of the water, it’s good to have the storage already supplied before then. That way the plant won’t be stressed during the middle of the day when the sun is shining bright and the temperatures high.

Petunia Plant
Petunia Plant

Overwatering A Petunia

It’s very possible to overwater a petunia, but thankfully it’s pretty easy to spot when this is happening. As there is too much water in the soil then the roots won’t be able to get any oxygen anymore. That will eventually cause them to drown.

Without the roots able to take any nutrition from the soil and pass on then the rest of the plant will rather quickly die off. The most prominent sign  of overwatering would be that the plant is turning black on some parts. But looking at the soil too, if it’s muddy and a lot of water is trapped at the top, then that means the soil has been overwatered.

How Does A Overwatered Petunia Look

An overwatered petunia plant will have black spots on the stem and the leaves. That basically means the roots have been overwatered and drowned. But leaves starting to curl or wrinkled or even start hanging are also signs of the soil having too much water in it. Serious issues as it will carry long term issues with it. 

It’s much harder for the plant being able to recover from overwatering then from underwatering.

Watering Petunia Seedlings

Seedlings of petunia are especially susceptible to watering. These can’t be overwatered, as that will cause the plant to be severely damaged and you might have ruined your chance of having beautiful petunia plants at home.

Try to keep the soil slightly damp all the time. That way we can encourage the roots to continue to grow and flourish.

Petunia Flowers
Petunia Flowers

FAQ

Do Petunias Need To Be Watered Daily

It’s not necessary to water petunia plants on a daily basis. Instead it might be better to hold off a few days and water perhaps once a week or twice. That way we have a more wavy balance and not risk overwatering the plant either. But it will also depend a lot on the climate that you are living in.

Can You Overwater Petunias

It’s very possible to overwater petunias. But thankfully most varieties are rather hardy and could survive. Try and keep the soil no more than damp to help the roots grow steadily.

How Often To Water Petunias In Hanging Baskets

Petunias in hanging baskets will need to be watered carefully. As the water can’t really drain away anywhere. So take a good look at the top soil before adding more water. Try to keep it slightly damp all the time.

Additional Information

Read more articles about Houseplant Care

Search For More Information

How To Grow Supertunia Vista Bubblegum

What Is ItPlanting SupertuniaWatering The Right WayHow To Grow A SupertuniaSupertunia vs TuniaBuying The SeedsBest Time To PlantPlant NeedsBest Soil TypeDisease And PestsFertilizing Supertunias

The supertunia vista bubblegum might have a pretty funny sounding name but is infact a very beautiful plant that most gardeners should consider getting for their home. It’s easy to grow and manages very well in warmer climates where there always isn’t great access to water.

With its gorgeous pink color it sure is a great addition to your garden. It will bring everything to life with its color and beauty. We are here to share with you our best tips and tricks for caring about the plant. Luckily it’s a pretty low maintenance plant.

Supertunia Vista Bubblegum

What Is Supertunia Vista Bubblegum

The supertunia vista bubblegum has, like we said, a pretty special name, but it’s also a pretty special plant. It’s a part of the supertunia family and has a lovely pink color to it. 

It’s a annual plant that will grow very quickly and soon establish itself after you have planted it. For us a great way for beginners to start out with petunias because of the low maintenance that comes with it.

They won’t normally grow more than 2 feet at most in height and require no more than 4 hours of sunlight each day. This makes it very easy for most people to find a spot for it in their garden. On top of that, it manages fine in environments where there isn’t a lot of rain.

How To Plant A Supertunia

The petunia plant is one of the hardiest houseplants or decorative plants we have encountered. They can manage cold temperatures very well, meaning that we can plant this one quite early in the year.

Early to mid spring is a great time to start with this plant .The earlier you get this plant growing in your garden, the longer you will be able to enjoy it flowering and flourishing in your home. 

Since it will grow quite bushy you can spread the seeds pretty liberally across whatever area you want to grow thyme at. Note that they will form a bushy plant that won’t be taller than 2 feet at most. This gives you a lot of freedom as to choosing an appropriate spot for it.

Watering the soil properly in the beginning will be very important. Try and keep the soil slightly damp all the time in order to promote the growth of the supertunia plant. This will have long term benefits as more flowers will appear as the plant is happily growing from the start. 

Watering The Plant The Right Way

We briefly touched on watering the supertunia vista bubblegum plant. That name is just incredible, but let’s talk about watering it the right way. After choosing a good spot for it to grow this is the next most important step we need to know. 

The plant won’t require more than about 4 hours of sunlight each day, that means the soil will stay pretty humid for the most part as not a lot of sun will dry it out. What we have found throughout the years is that the best soil for a supertunia will be a slightly damp one. This will promote the root growth of the plant and its long term health for the season.

We keep a schedule of checking the soil around at least every other day or so. Doesn’t mean we have to water it, but checking it is just as important.

How To Grow A Supertunia Vista Bubblegum

Growing this specific variety is really no different than any other in the family. It will require quite a low amount of sunlight each day, 4 hours will be plenty enough for it. So it should be pretty easy to find a good spot.

We like to have it growing in front of other plants, as sort of an outline almost. It doesn’t grow very tall, so other plants won’t be hidden behind it. Clear up the space and turn the soil where you wish to plant it. Spread the seeds quite liberally and sprinkle a thin layer of soil on top of it. 

Water the soil slightly and try to keep it a bit damp until you start seeing the first seedlings taking shape. At this point you don’t have to water that often as the soil should be able to hold on to a good amount of water. Pruning or in any way cutting the plant is not necessary either. 

Supertunia Vista Bubblegum

Difference Between Supertunia And Tunia

The biggest difference between the two families are that supertunias tend to be both self cleaning but also produces a lot more flowers throughout the season. This is great news for the bee population you have as it means more food for them.

Supertunias also tends to have lower requirements for care and will grow more aggressively as well. They can quickly establish themselves in the area, but they are annual so you shouldn’t worry about them sticking around for too long.

Where Can You Find Supertunia Vista Bubblegum Seeds

The best places to find seeds for these plants are in your local gardening store. It’s a common family of plants do most stores will carry a wide selection of seeds to choose from.

But you can also order online. Amazon is a great source for us when it comes to buying petunia seeds. There seems to be a great community there that offer them for a relatively low prices as well.

When Is The Best Time To Plant It

The best time to plant supertunias are really as early as possible. It should be freezing during the night, but as soon as that risk is gone then you can plant the seeds. 

It’s an incredibly hardy plant that can manage through really tough weathers and climates. The best part is that you most likely will enjoy its beauty well into autumn as the vista bubblegum can handle very low temperatures and dry climates too.

Supertunia Vista Bubblegum Plant Needs

The most important needs for the supertunia vista is probably the amount of water its getting. We have said before that the soil should ideally be slightly damp all the time. This will create the best possible environment for the plant to grow in.

You should check the soil about every other day during the summer so as to not miss a day when it might need more water. But on top of watering the plant,you should also fertilize the soil slightly too. This is done by diluting the fertilizer with water. Don’t do it more than once a month as it otherwise might have negative impacts.

Best Soil Type For Supertunias

The best soil type for supertunias seems to be a well draining soil made up of clay and sand. Here the roots can quickly establish themselves and make up a healthy root system. But the water you are adding won’t drown them either as the soil lets the surplus drain away and be stored far beneath the ground instead.

Supertunia Vista Bubblegum

Disease And Pest Control

Disease and pest control is not really an issue when it comes to supertunias. The plant can dispel most diseases and we have never seen any pests be attracted to the plant throughout all the years we have grown it either. 

Instead just focus on maintaining the requirements of the plant, watering and fertilizing the soil properly.

Propagating And Fertilizing Supertunias

Propagating new supertunias is not really worth it. Instead you should wait for the flowers to begin developing seeds that you can harvest eventually. These can then the next year be planted and you will once again be able to enjoy its beauty.

Fertilizing the soil is something we have already touched upon a little bit. The plant doesn’t need anymore of it then once a month. This will help prevent over fertilization it which could burn and kill the roots instead.

Additional Information

Read more articles about Houseplant Care

Search For More Information

How Often Should You Water A Fern

plant, fern, nature-2388823.jpg

What Is FernHow Often Should You Water A FernWatering Indoor FernsFern VarietiesWatering Outdoors FernBest SoilAvoiding OverwateringPlanting New FernsAvoiding IssuesFAQ

The fern plant might not be the most popular type of houseplant to keep at home, but despite that it is a great addition if you want something kinda wild looking. There are so many different varieties of ferns out there, all with their own special look to them.

It’s a hardy plant that can manage in both dry and wet climates, cold or warm temperatures. It’s an all around really great houseplant to have if you want something low maintenance and low risk of running into issues with. As for water, we often do this once a week at least, but doing it twice won’t kill the plant.

Fern Plant
Fern Plant

What Is A Fern

The fern family is very large and there is more or less a variety for everyone out there to choose from. They are a hardy family of plants that can manage fine without water for several days or in cold and warm temperatures too. 

Planting one home is often done in a south facing window where the plant can get a lot of sunlight each day and continue to grow and prosper. Try to fertilize the soil also every now and again. 

We often do this about once a month or so. That way we can keep the plant’s growth in line with what it naturally should be. Anymore and you might instead risk the plant starting to turn yellow from the soil being to low in pH and over fertilized.

How Often Should You Water A Fern

Like we have mentioned here before, the fern will need to be watered about once a week or so. You don’t have to worry about doing it anymore than that. Either you water a little bit each day or about 1 gallon once a week for a full grown and large fern plant.

This means keeping a fern is a very easy job to do. Its self reliant and can manage without water for at least 2 weeks or so in total. But watering will also depend on the type of soil that you are growing it in. If you have a clay soil then you might need to water slightly more as the water will have an easier time escaping. But if you have regular soil then you can water as normally since that will keep the water in there a lot better.

Water A Fern Plant Indoors

Watering a fern indoors will be much the same as outdoors. The plant can manage fine with water about once a week or so. That will be plenty enough. Since we have already praised the plant for the sturdiness and hardness of it, you might guess that it indoros will be fine without water for a few weeks.

Just have a look at the soil before you add any more water. If the soil is already really damp and almost mud-like, then adding more water might cause the roots to drown instead as oxygen cant reach them. moderation really is the key when watering ferns, or any plant for that matter.

Fern Plant Varieties

Let’s look at some of the different varieties of fern out there. They all grow slightly different but are great starter plants for beginners. Low maintenance and low risk for diseases and pests.

Boston Fern

The boston fern is perhaps one of the hardiest varieties of fern. If you are keeping it in direct light for at least 8 – 10 hours each day then you might need to water once a week at least. All in order to keep the plant in a good state. It manages fine with direct and bright light.

Asparagus Fern

The asparagus fern has quite thin and small leaves. That means there is less water being used. We therefore recommend you to be careful with watering as the plant won’t be able to use up as much of it as other varieties.

Staghorn Fern

The staghorn as opposed to the other varieties has much larger leaves and a relatively compact root system that doesn’t really spread out that much. If you are keeping it indoors and the air is dry then it might actually need daily watering as the plant will use up quite large amounts of water.

Maidenhair Fern

The leaves on the maidenhair are pretty small but the density of leaves will be much higher than the other varieties we have discussed already. Since we started growing this plant we have noticed that awatering about every 7 – 10 days or so will be plenty enough.

Birds Nest Fern

This variety is a little bit different from other ones, it will actually prefer a more humid environment instead. In a humid environment, like down in Florida this plant can manage fiend without water for a week at last.

Lemon Button Fern

The lemon button is just like other varieties, it likes to get a lot of water. Try to do it about once a day or every other day. This will be especially important if you are growing the plant in a small pot where there is not a lot of soil to hold water.

Kimberly Queen Fern

The kimberly queen fern is a great option to grow in clay soil for example. It requires a pretty standard watering schedule of once a week or so. But just like always, it’s important to look at the soil beforehand to avoid overwatering and harming the roots.

Fern Plant
Fern Plant

Watering A Fern Outside

Watering a fern outside is thankfully very similar to indoors. You need to get down on your knees and look at the soil before adding any more water. We are persistent with mentioning this step because it’s a great prevention for accidentally overwatering a plant.

But outdoors, the fern plants will need watering about once a week or so, just like the ones indoros. You can water in quite large amounts too.

Best Soil For Fern

The best soil for fern seems to be a mix between sand and clay. This is a soil that can maintain the water quite well, which makes it easier for the plant to go long times without a lot of water. 

It might be hard to grow like this outdoors and find the right soil. But indoors in a pot then you can definitely try this combination of soils and reap the rewards by having a very happy fern plant.

How To Avoid Overwatering A Fern

The best of avoiding to overwatering a fern plant is to first look at the soil beforehand. This will give you a good idea of the state of the soil that the plant is growing in. If you notice it has a rather damp and almost muddy texture, then you can probably hold off watering for a few days before checking again.

A common occurrence when you have overwatered is that the leaves will begin to turn black as the roots are dying from drowning and lack of oxygen.

Planting New Fern Plants

Planting a new fern is very easy. If it has already developed a good root system then you will most likely not run into any issues when transplanting it. It might be a bit hanging and slacking the first days as it is getting used to the new environment.

But keeping the soil slightly damp and in a well lit place you shouldn’t run into any more issues.

Avoiding Issues

The family of fern plants are generally very hardy and will endure during times of warm or cold temperatures. But a good rule of thumb is trying to keep it in a south facing spot where it can get sufficient amounts of sunlight. Try and keep the water slightly damp all the time as well. That way the roots will have an easy time growing and expanding.

Fern Leaves
Fern Leaves

FAQ

How Often Should You Water Ferns In The Summer

In the summer you should definitely be checking your fern plant about every other day. It might actually need to water every other day as well, depending on the variety you are growing. A good rule is to keep the soil slightly damp all the time.

Do Ferns Need A Lot Of Sun

They won’t require a lot of sun, but we have notice we run into less issues if we can get our plant a lot of sun during the day, at last when growing indoors.

How Often Should You Water Ferns Indoors

Watering a fern indoors is often done every week at last. But you might need to do it more during the summer if the air is very dry and water will disappear more quickly, or the plant is using more than normal.

Additional Information

Read more articles about Houseplant Care

Search For More Information

5 Reasons Why Geranium Leaves Might Be Turning Yellow

geranium, plant, medicine-4287012.jpg

What Is Geranium Why Are Geranium Leaves Turning YellowPreventing Yellow LeavesFAQ

A plant starting to turn yellow in color can be caused by a number of different things. But thankfully most of these issues are rather easy to fix and remedy. Most houseplants, the geranium plant included, are pretty sturdy and can manage through some hard times.

We have grown this wonderful plant for many years and we are excited to share some knowledge with you. Hopefully you can get your geranium plant back to what it once used to be.

Geranium Plant
Geranium Plant

What Is Geranium

The geranium plant is perhaps not the most common variety as for houseplants, but it’s definitely worth exploring despite that. There are a large amount of different geranium varieties out there, all with their own sort of twist and look to them.

One of our favorites is the lemon geranium or the rose geranium too. These are really beautiful and easy to grow houseplants. As for caring for it, you would know that generally speaking the geranium plant can manage fine in dry and warm climates, but left without water for too long you will begin to see issues appearing.

Geranium is often used as a bedding plant, and quite an effective one too. It prefers living in a sunny spot where it can also get some shade during part of the day. Finding this spot will provide a long and healthy life for your geranium.

Why Geranium Leaves Might Be Turning Yellow

Like we have previously mentioned, there are a number of different reasons why a geranium plant might begin to turn yellow in color. Below are some of the common reasons we have run into that causes it. Thankfully, these issues are rather easy to fix and won’t require a large amount of work.

Inconsistent Watering

If you don’t have a set schedule for watering your geranium plant then you might begin to see some issues, yellowing leaves being one of them. The plant prefers living in a rather dry soil that doesn’t get too much water at a time. But if your approach has been to water heavily every now and again, then that will cause a lot of stress to the plant. 

Eventually the leaves will begin to turn yellow as the plant can’t handle the inconsistency of watering anymore. But fixing this is easy. You just need to water the plant less and never in large amounts that drastically transforms its soil.

Too Much Sunlight

A common occurrence when a plant gets too much sunlight is yellowing leaves, the same goes for the geranium plant. Since this plant can be grown both indoors and outdoors, the requirements are slightly different.

Indoors you should keep the plant in a south facing window in order to maximize the amount of sunlight the plant will get. We normally try and aim for about 8 – 10 hours like this. But outdoors you should find a slightly shady area. Any more than about 8 hours of strong sunlight outdoors and you might begin to see yellowing leaves eventually.

Fungal Diseases

This is perhaps the least common issue that one will experience when growing a geranium plant. Fungal diseases only really occur when the soil is very unhealthy and the plant the same.

Keeping the soil well fertilized and rich in nutrients is often the best way to keep these illnesses away. But the tricky part is identifying these issues. It will be displayed beneath the soil on the roots most often. So in all honesty it might be too late sometimes to fix it if the already has been a lot of damage.

Low Soil pH

If your soil that the geranium is growing has a low pH then it will begin to burn the roots of the plant. Often caused by misusing some fertilizers that will sour the soil. Fertilizing the soil only about once a month at most will greatly help the health of your plant and the longevity of it too.

You can take pH tests on your soil yourself, these tests are relatively easy to get a hold of. It’s great for also documenting the state of your soil if that is something you are interested in. Adding eggshells is a great way of boosting the pH to a more neutral level instead that will benefit the geranium plant.

Low Or Sudden Change In Temperature

If you are keeping your geranium plant in a pot and move it outside too early during the year then that can greatly harm the plant. It’s a very hardy plant that can manage low temperatures, but when the plant goes from the warm indoor temperatures to the cold outside in the span of a day, then you might see yellow leaves.

To best counter this you should let the geranium plant adapt more slowly to the temperatures of the outside. It will help build up the plant more and lower the risk of any further issues.

Geranium Leaves
Geranium Leaves

How Do You Prevent Yellow Geranium Leaves

The best way to prevent a geranium plant from getting yellowing leaves is often to just keep it in its prefered environment.That means the soil should be kept slightly dry to avoid overwatering and stressing the roots. 

But in terms of sunlight you should find a very sunny spot if you are keeping it indoors. Fertilizing the soil is also very important. We stick with the recommendation of doing it about once a month only.

FAQ

Should You Remove Yellow Leaves From Geranium

It’s pretty difficult getting the yellow leaves to once again turn back to green. But removing them also causes stress to the plant, which might cause more yellow leaves. So we recommend you to leave them alone and let them fall off by themselves.

Will Yellow Geranium Leaves Turn Green Again

It’s possible to get the yellow leaves to turn green again, but it should be stated that it’s pretty difficult. To increase the chance you should try and fertilize the soil a little but each month.

How Often Should I Water My Geraniums

We check the soil of our geranium plant at least every other day or so. But we might not water the soil all the time. Instead we only do it when we notice the soil is beginning to crack from being too dry. It should almost be crumbly to be the best soil texture.

Additional Information

Read more articles about Houseplant Care

Search For More Information

7 Reasons Your Hydrangea Leaves Are Turning Yellow

hydrangeas, flowers, purple hydrangeas-3523579.jpg

What Is Hydrangea Why Are The Leaves Turning YellowPreventing Yellowing LeavesHydrangea FertilizersFAQ

If you are growing a hydrangea plant at home then you might run into a few different issues. The plant can experience turning yellow from a number of things. Thankfully we have put together this article that will guide you to amending your plant and having it turn back into its former self.

Some of the common reasons you might see a hydrangea plant turn yellow are overwatering, issues with the soil and general lack of nutrients. Some issues are more harmful to the plant than others. Hydrangeas are normally pretty hardy and can receive themselves.

Hydrangea Plant
Hydrangea Plant

What Is A Hydrangea

The hydrangea plant is a rather common houseplant that can be bought in most well assorted gardening stores. Just like most houseplants it grows the best in warmer temperatures and with plenty of access to sunlight.

It likes a soil that is kept rather well watered but at the same time gets well drained too in order to protect the roots from dying. It’s a perennial plant that can live on for a number of years before it might start wilting down a little bit.

Taking care of the hydrangea is generally very easy since it’s a low maintenance plant. Pruning or cutting the plant is rarely done. Instead, keeping care of the soil is most of the work. Fertilizing and adding some nutrients to the soil is very important. This will in the long term help your hydrangea a lot.

Why Is Your Hydrangea Leaves Turning Yellow

Like we said previously, there are a number of different reasons why you might see your hydrangea plants’ leaves begin to turn yellow. Below is a list of 7 common reasons you might see it happen. They are pretty easy to fix and you should quickly see an impact or result.

Overwatering

Overwatering any plant is never good. The roots have a really hard time surviving when this is happening. Too much water causes oxygen to have a hard time reaching the roots. Without any oxygen they will begin to drown. 

If the roots die then they can no longer pass on any more nutrients to the rest of the plant. It will quickly begin showing as the leaves and the stalks cna no longer hold up itself. One of the common early signs of this happening would be the leaves starting to turn yellow in color.

To keep the hydrangea plant the happiest the soil should be slightly damp all the time. That will help keep the roots alive and well and still able to drain nutrition to pass on. Never follow a set schedule for watering, instead just water when the plant needs to. Sometimes it might not use up as much water as the previous weeks.

Lack Of Nutrients In The Soil

Sometimes a lack of nutrients will cause the leaves to turn yellow on the hydrangea plant. Often caused by not fertilizing them enough. Since you are most likely growing the plant in a pot, there isn’t any new nutrition able to pass in naturally.

This means we need to ourselves add this nutrient by fertilizing the soil. You thankfully don’t have to do this very often. About every other month or so seems to be the ideal. There is a risk of overfertilizing the soil too. This will instead cause the roots to begin to burn as there is too much nitrogen present. 

If you wonder what the best type of fertilizer might be for hydrangea, then we will say that a general houseplant fertilizer will do the job. They can be found in almost any well sorted gardening store.

Diseases Related To Hydrangea

Three are a few different diseases that are related to growing hydrangea. The first one being root rot. This isn’t exclusive to this variety, it happens when there is too much water in the soil and therefore a pretty easy problem to fix.

Other than that it could be hydrangea mosaic virus or tomato ringspot virus too. These are really serious issues that can occur when the plant is not getting enough nutrients and sunlight. The immune system of the plant is weak and disease then has an easier time getting a hold of the plant.

Not Getting Enough Light

All plants will need sunlight in one way or another. But the amount that they need will differ. The hydrangea plant for example will need about 8 – 10 hours each day if you are keeping it indoors. Less during the winter of course.

But if the plant is consistently getting a low amount of sunlight then the leaves will begin to turn yellow as they are no longer performing photosynthesis. This is a very important process that converts sunlight into energy, but also is responsible for keeping the chlorophyll in the leaves, that being the component that makes them green.

Sudden Changes In Temperature And Environment

If you are moving your hydrangea plant from indoors into your garden instead then you might see some shifts in the way the plant looks. If you do it too early during the year and the nights still have really cold temperatures then it will harm the plant.

It should be said that hydrangea plants can grow fine outdoors during the summer, but wait with moving them until the temperature has actually gained. The risk for frost should be completely off.

Low Soil pH

If the pH in the soil is too low then that can also impact the roots quite severely. It won’t cause them to rot, but they will begin burning almost. It scorches the outside of them and makes them unviable for draining any more energy from the soil.

If the roots can’t work properly then that will greatly affect the rest of the plant. We recommend using some fertilizer for the soil if you notice a low pH. Fertilizers are the opposite and tend to raise the pH instead. If you don’t want to use fertilizers, then adding some calcium to the soil could also work. The organic way would be to use crushed eggshells.

Fungal Infections

Fungal infections can happen when the plant does not have a good immune system to protect itself. This is often happening when the soil is left unattended for too long. A humid and too watered soil will make for a good environments for these fungal diseases.

Hydrangea Leaves
Hydrangea Leaves

How Do You Prevent Hydrangea Leaves Turning Yellow

The best way to prevent a hydrangea plant from turning yellow is to simply keep it in the best possible nevoiremtn. This means caring for the soil and placing the plant in a very sunny spot. 

Try and make sure the soil is slightly damp all the time and during the summer you can use some fertilizer to further boost the health of the plant. Place the hydrangea in a south facing window to help maximize the amount of sun it will get.

Using Fertilizer For Hydrangea Plants

The best fertilizer for the hydrangea plant is a general houseplant one. This will help boost the nutritional value of the soil and ensure the plant can continue to grow. But don’t over do it. Limiting yourself to using fertilizers about every other month or so only is what we follow. That way we protect the roots also.

FAQ

What Does Overwatered Hydrangea Look Like

An overwatered hydrangea plant will have yellowing leaves but if left overwatered for even longer, these leaves will instead turn black. The plant is basically rotting from beneath the soil right now.

Will Overwatered Hydrangea Come Back

An overwatered hydrangea plant comes back if you act quick enough. If you see that the soil looks like mud then you should move it to a warmer and sunnier spot. That will hopefully make the soil dry out a little bit quicker.

Hydrangea Leaves Turning Yellow With Brown Spots

If you are seeing brown spots in your hydrangea plant then you should check the soil. Is it really watery or muddy, or perhaps very dry? If any of that is true then you need to change something about your watering. Try and make sure the soil is damp instead to help create a healthy environment for the roots.

Additional Information

Read more articles about Houseplant Care

Search For More Information

Do Roses Actually Like Coffee Grounds

hd wallpaper, rose, flower-3499375.jpg

Benefits Of Coffee GroundsDo Roses Like ThemWhen Should You Use ItUsing It As FertilizerOther FertilizersNegativesSaving Coffee GroundsFAQ

There seems to be a trend nowadays to be adding coffee grounds to the soil. Most Likely because people are still drinking coffee regularly and want to make some use of the grounds somehow. As roses are a rather popular plant to grow at home, more and more gardeners are wondering whether you should add coffee grounds.

We can definitely say that there are benefits to adding coffee grounds to the soil. They can help fertilize the soil as it is decomposing. But we need to use it in moderation as there are things in coffee grounds that can in surplus have a negative impact.

Rose Plant
Rose Plant

Benefits Of Using Coffee Grounds With Roses

There are benefits to adding coffee grounds to the soil like we said before. There is a large amount of nitrogen and aven potash in the grounds. These are really beneficial to the rose plant in terms of making it grow better and larger.

Nitrogen is in fact one of the most important things for a rose plant in terms of keeping it healthy and still growing. It helps the rose plant basically be more protected against disease and other things that could harm the plant. 

On top of benefiting the plant’s immune system it also helps keep the roots more healthy. If the roots have a hard time then the rest of the plant will too. There is a risk however when you add too much coffee grounds. It will burn the roots of the plant because of the nitrogen content.

But besides the nitrogen content in the coffee grounds there are also a lot of minerals that get added to the soil too. Some of these minerals are copper, potassium and phosphorus.

Do Roses Actually Like Coffee Grounds

Roses can actually get a lot of benefits from coffee grounds. So you can definitely say that roses actually like coffee grounds. When you add it to the soil you are boosting the level of nitrogen in the soil. 

This addition of nitrogen can really help rose plants be able to more easily dispel diseases and sickness. But too much will instead start harming the roots as they are basically getting burnt. So keeping it in moderation while fertilizing the soil is very important. Just like anything really. 

Organic material coffee grounds also help improve the soil drainage. Raw and organic material like coffee grounds makes it easier for water to drain down and not stay and suffocate the roots. A healthy and nutritional ecosystem in the soil is also very important. Coffee grounds help with improving the diversity of nutrition.

When Should You Use Coffee Grounds

The best time to use coffee grounds is during the spring and the summer. It’s often used to help boost the immune system of the rose plant. But since the growing season will be during the summer mostly that is also when you want to fertilize the soil.

Adding it about once a month or so to the soil will be plenty enough. Nitrogen and potash are things that will stick with the soil for a long time. We mentioned that if we were to add too much then you will harm the roots quite severely. They will begin to burn from the too high amount of nitrogen in the soil.

Rose Plant
Rose Plant

How To Add Coffee Grounds As A Fertilizer

The best way to add the coffee ground to the soil is by diluting it with some soil. It will make it easier to disperse the coffee grounds evenly and not over concentrate some parts of the soil.

We normally do about 2 parts coffee grounds and 1 part soil. Then you basically lay it on the top part around the rose bushes. Dig around and turn the soil to let the coffee grounds get beneath the surface.

Other Fertilizers For Roses

There are a lot of other fertilizers as well that are available for rose plants. We like to use ornamental fertilizer for flower fertilizers that are found in most gardening stores. But if you are lucky you can also get some specific rose fertilizers.

Don’t add these too much either as that will instead just harm the roots too. We recommend fertilizing the soil about once a month, just like with coffee grounds.

Negatives Of Using Coffee Grounds

The most noticeable negative about using coffee grounds is that too much nitrogen in the soil can have a really bad impact on the roots of the plant. It will begin to burn the roots and basically make them useless to draining and passing on nutrients. 

The same thing can happen when adding too much regular fertilizers as well. It makes the soil too overly rich in some nutrients that will create an imbalance.

Saving Coffee Grounds

You can’t save the coffee grounds for too long. But up to a week or so they will keep rather well. If you are brewing coffee once a day then saving a week’s worth of coffee grounds will be a good amount to add to the soil.

The reason we don’t want to save them longer than a week is that it will start decomposing really badly and begin to smell. If you don’t have the option of storing it outside your house then you shouldn’t save it for too long.

Coffee Grounds
Coffee Grounds

FAQ

What Plants Do Not Like Coffee Grounds

There are a number of different plants that will not enjoy coffee grounds. Some of the most commonly grown plants are geranium, asparagus fern, Chinese mustard and even Italian ryegrass. These plants will begin to start looking worse and worse if you add coffee grounds. The leaves might turn yellow for example.

Do Roses Like Eggshells

Since eggshells are really rich in calcium, they can really help boost the immune system of the rose plant. The eggshells help boost the walls of the plants cells tissue. For the long term this is very beneficial. It will lessen the risk you see your plant begin to wilt or grow smaller and slimmer.

Do Roses Like Banana Peels

Banana peels are rich in a lot of nutrients that can help roses to grow more and more. You can throw the banana peels in a compost and let it be processed there, or you can dig the peels down around the rose plant. It will quickly begin decomposing and releasing the nutrients in the peels.

Additional Information

Read more articles about Houseplant Care

Search For More Information

How To Dry Lavender At Home

lavenders, flowers, purple flowers-3479492.jpg

What Is LavenderVarietiesHow To Dry LavenderWhen To Cut And HarvestPrune LavenderBest VarietyDoes It Take LongStoring And Using LavenderDrying Lavender LeavesHow Long Does It Last

Lavender is a very fragrant and lovely plant to grow at home, but it’s also a great addition to add as decoration. We do this by air drying the lavender in bundles. They add aroma and beauty to any room they are in. 

Below we are sharing our tips and tricks for drying lavender and treating it right so as to not lose any of the aroma and flavor. But apart from using it for decoration, there’s also plenty of other uses. All from making tea to decorating cakes.

Lavender Plant
Lavender Plant

What Is Lavender

Lavender is a very common plant that has lovely purple flowers during the summer. It’s a very fragrant plant that has for many centuries been used in aromatherapy and herbal medicines.

It was often believed that the plant held on to some nurtoring properties that could aid in helping with sickness and ills. Nowadays lavender is mostly planted to have something nice and fragrant in the garden. But it also attracts a lot of bees since there will be a large amount of flowers on a rather small plant.

If you are considering getting some lavender for your garden then we recommend reserving a rather sunny spot for the plant. This will help ensure that you have a lot of flowers on the plant, but also a happy plant able to continually grow. Never let the soil dry out completely, try and keep it slightly damp instead.

Lavender Varieties

You can basically narrow it down to 3 different lavender varieties out there. They would be the English, French and Spanish lavender. There are some quite noticeable differences between them. Mostly in the way that they grow and the size of them. 

From this group of 3 there are many other sub varieties. Here they vary in size a bit. Some will grow rather small and narrow, while others might grow extremely large in size instead with a dense amount of stalks.

All the lavender varieties have a very nice and intense aroma, but there is a winner if you want the best one. The English lavender is often the most sweet and useful variety for culinary adventures and applications. 

Thankfully it’s rather easy to know which variety will be able to grow in your part of the world. The English one is the hardest when it comes to the cold. The french one can manage fine in mild climates, while the spanish lavender is instead better suited for places with high temperatures and a lack of water.

How To Dry Lavender

There are many ways you can go about drying lavender, but we like these three different methods because they are the best at preserving the flavor and profile of the lavender. A good rule of thumb is that the more gently you dry the lavender, or any herb or plant for that matter, the more aroma and flavor will be left in them.

Air Drying Lavender

This is our favorite method. Air drying lavender is a great technique to use when you want to both take care of your harvest but also to decorate a room and add some lovely aroma there. 

The method consists of taking some long lavender stalks or sprigs and tying them together. We then let them hang upside down with the flowers towards the ground. It will take a few weeks until they are fully dried up but the aroma and flavor of them will be really intense.

You don’t have to take them down after they have dried up. Instead you can leave them hanging and clip off whatever you need when you want. They store flavor and aroma very well like this.

Oven Drying Lavender

This method is very good for preserving and storing a large amount of lavender in one go. We do it by simply removing most of the flowers from the plant. Lay them out on a tray with some paper underneath. 

We then dry the lavender in the oven at the lowest possible temperature. This will take between 6 – 8 hours or more depending on how well hydrated the flowers are and the temperature you are using. We can store them like the air dried ones, so instead we should use an air-tight container to keep mice away.

Dehydrating Lavender

If you are lucky enough to have a dehydrator at home then this might be a great method for you to use. It’s very good for drying large amounts of lavender. We use more or less the same technique as the oven dried lavender.

Pick the flowers apart and then lay them in the dehydrator in the different layers. Set the temperature to the lowest. It will be a bit quicker than the oven dried ones. Between 4 – 6 hours or so in total. Just like before, we should try and store the dried lavender in an air-tight container to keep moisture away.

Lavender Flowers
Lavender Flowers

When To Cut And Harvest Lavender Flowers

The best time of the year to be cutting and harvesting lavender flowers are at the end of the summer. The plant doesn’t really bloom and let the flowers fall off that quickly. Instead they stay on for a rather long time.

So by the end of the summer when the temperature drops and the plant has had a long and prosperous time the flavor and aroma will be at their peak. Take a sharp scissor and cut off the flowers only if you are oven drying or dehydrating. But if you want to air dry, you can cut off some of the stalks as well to make it a bit easier tying them up.

How To Prune Lavender

Pruning lavender is mostly done when it’s one of the larger varieties. Those tend to grow rather quickly during the season and can look unpleasant by the end. So pruning them is good to keep them inline and also have a beautiful garden.

We normally prune them at the start of summer and a little bit during too. You just need to clip off the top to sort of keep the same length on all of the stalks. The clipped stalks will begin developing flowers eventually. At that point the entire lavender plant will have a more bushy appearance that we prefer.

Be careful to not prune too much though. Taking away more than 1 third of the plant at a time might cause too much stress to it.

Best Lavender Variety For Drying

We mentioned the varieties of lavender before and for us there is a clear winner. The english lavender is the most concentrated in aroma and flavor. It’s also great for almost any climate since it can handle both warm summers and cold winters. 

It’s our favorite and the one we are growing at home right now. It won’t grow that large either. Instead the plant will be about 1 foot tall and stay at that for most of its life. The flowers are beautifully purple and full of aroma and flavor. Best suited for air drying and letting fill the room with its perfume.

Lavender Plant
Lavender Plant

Does It Take Long To Dry Lavender

It really doesn’t take that long to dry lavender if you are using the oven drying method or a dehydrator. Then you can dry a large harvest in one day at least. The method we recommend however usually takes a lot longer, between 1 – 2 weeks. But then we are air drying them outside. We tie a bundle and let time do its thing. The benefit of this is that the flavor and aroma of the lavender will be so much more concentrated.

How To Store And Use Dried Lavender

Storing and then actually using your lavender is also a big part of taking care of your harvest. We have a number of different methods of using them, but only one way to store them. If you want to keep them for the long term then you need to have an air-tight container to store them in.

This will keep moisture away and make it a lot less likely any form of bacteria and mold starts growing on them. We mostly use that though, when the lavender has been picked down to its flowers only. If we are air-drying a bundle then that can stay out without any problems.

Being able to use the lavender finally might be the best part. We like making tea from the aromatic flowers. It’s nice and sweet with a very perfumed aroma. But decorating a cake by sprinkling some flowers over the top is also a great way of using them.

How To Dry Lavender Leaves And Buds

The leaves and the buds might not be the most common part of the plant to dry. But they actually do offer quite a lot of flavor and aroma. We like to oven dry or dehydrate these parts of the plant. 

Pick the leaves from the plant and then lay them flat on a tray with the picked lavender buds too. Dry them at the lowest possible setting for about 6 – 8 hours. Try to store them in an air-tight container afterwards.

Lavender Plant
Lavender Plant

How Long Does The Dried Lavender Last

Once the lavender has dried then it can last for a very long time. Often between 1 – 2 years at least. It will all really depend on the type of storage you are using. If you keep them in an air-tight container then the lavender will be fine. 

The thing we want to avoid is mousitire as that makes it easier for mold to grow on the dried lavender. Once you have kept them for over a year, you might start noticing a lack in aroma and flavor as that can’t be kept up forever. So using it up while you can and then preserving next year’s harvest instead is probably the best way to go about it.

Additional Information

Read more articles about Preserving Your Garden

Search For More Information

How To Harvest Cilantro Seeds

coriander, seeds, seasoning-166989.jpg

What Is CorianderHarvesting Cilantro SeedsDry And Store CorianderPlanting Coriander SeedsDrying Green CorianderFAQ

Coriander is one of the most commonly used herbs in the kitchen. In the US it might be known as cilantro however. So coriander and cilantro are in fact the same herb, just different names for the same thing. 

It’s a nice aromatic herb that grows in a number of different climates and environments. The seeds are perhaps a little underappreciated by most people, they are a hassle to harvest but provide a lovely flavor and aroma to whatever you are cooking. Below we share some of our tips and tricks for harvesting them.

Coriander Plant
Coriander Plant

What Is Coriander

Coriander is a very common herb that is found in a lot of households. It’s one of those herbs that you either really love or not at all. About 10 % of the population has a genetic thing against this herb, making it taste like soap to them, quite interesting really.

But the plant itself will prefer to grow in a soil that is kept well watered and where water also drains away very easily. This will help protect the roots from starting rot very easily. As for picking a spot for the plant, try and find a very sunny spot. This will help the plant quite a lot. When you are growing coriander it really is about the balance between getting enough sunlight and also keeping the soil in a good condition.

How To Harvest Coriander Seeds

Let’s get started about the reason you even clicked on this article, actually harvesting the seeds. This is actually really easy, you just need to wait. As with most seeds on plants they will have a stage where they are green and fresh. But after a while they will begin drying up and turning either brown, gray or black, depending on the herb or plant you have.

As for coriander they will be slightly brown in color. At this point they are ready to be picked if they haven’t already fallen off the plant and landed on the soil. 

Gather the seeds and store them in a dry place. They will keep very well for many months, but planting them as soon as possible is recommended. Do this indoors then of course since outside it might be too cold for the plant.

To ensure you even have seeds developing on your plant you need to let the coriander flower and get pollinated. For this to happen you should keep it outdoors so bees can get in contact with it.

How To Dry And Store Coriander Seeds

It’s very easy to harvest the coriander, like we talked about above here. After you have gathered some you can lay them on dry paper and let them air dry in the kitchen for example. It might take a few days but afterwards they are ready to be stored for the long term.

After drying them, keep them in an air-tight container. They will store for years like this and are a great addition to anything spicy you might be cooking up at home.

How To Plant Coriander Seeds

If you want to plant the seeds instead then you can do so also. But we recommend you try to do this rather quickly after harvesting them. That’s because it will be more likely the seeds are beginning to root and develop then.

Place them in soil which has been well watered beforehand. They only need to be half an inch or so beneath the soil for it to start growing. Keep in a warm spot. have an eye on the soil so it’s never drying out. Try to keep it slightly damp all the time to promote the seed to sprout.

Coriander Seeds
Coriander Seeds

Drying Green Coriander Seeds

If you want to use the coriander seeds while they are still green and full of aroma then harvesting and drying them is really the only option here. 

Pick them when they are large and firm to the touch. Then lay them flat on a tray and dry them in the oven at a very low temperature. It might take many hours, but we do this to preserve them for the long term. They will store very well for at least 6 months before they might begin to shift in flavor.

FAQ

What To Do With Green Coriander Seeds

One of our favorite things to do with green coriander seeds is to use them in salsa. They add a very strong coriander flavor to the salsa but a very pleasant one. You could also add them to a pesto aswell to take it to the next level.

Can You Plant Green Coriander Seeds

You can’t plant green coriander seeds and expect them to start and sprout. For the greatest success you should instead try and harvest them after they have dried out by themselves on the plant. These are ready to be planted and grown into new plants.

Dry Coriander Seeds Benefits

Coriander is very rich in antioxidants and the same is for the seeds of the plant. They are a great addition to your diet. Antioxidants are very important for helping the body make it easier getting rid of or preventing inflammations like fevers and headaches.

Additional Information

Read more articles about Preserving Your Garden

Search For More Information

How To Harvest Chives – When Is The Best Time

chives, blooming, plant-967674.jpg

What Are Chives Chive VarietiesHarvest ChivesWhen To Harvest ChivesStoring Fresh ChivesPreserving ChivesFAQ

Chives are one of the best perennial herbs to have at home. it will grow back rather quickly after being harvested from. The plant can grow in a number of different environments and still be able to flourish.

Below we are sharing some of the methods we have developed during the years of growing this fantastic herb.

Chive Plant
Chive Plant

What Are Chives

Chives are a very nice culinary herb that has a nice spicy garlic flavor to it. It’s not that common among gardeners, which is a shame since it’s so easy to keep and care for.

Chives are a perennial plant that comes in different varieties. But the most common one will grow dark greens that eventually start budding and flowers into a pink color. 

Once you cut down the plant, it will continue growing back almost immediately. Often growing in a large bundle it’s very efficient at providing a large harvest from small amounts of land planted.

Chive Varieties

There are some different varieties of chives out there but there is one winner that stands at the top of popularity, that one being the common chive. Growing dark green with pink flowers, it’s a staple for some gardeners.

But there are some other varieties worth mentioning too. Below is a short list of some of our favorites.

  • Chinese Chives
  • Blue Chives
  • Hookers Chives

How To Harvest Chives

Harvesting chives is very easy. We need first and foremost a very sharp scissor. This is important because we want to clip the chives off and not leave a bruised area. It will make the regrowing quicker and more efficient.

Hold a bundle of the chive plant with your hand and then cut it off. It’s super quick and easy to harvest large amounts of chives. But make sure you have a plant for them as well. There is a big difference between fresh chives and those lying in the fridge for one day. The fresh one has a bite to them and the flavor is so much better.

Since the chive plant is so hard, you can just lay off harvesting too much and instead leave it for another time when you might need to instead.

When Should You Harvest Chives

The best time to harvest chives is before it starts flowering, that is if you want stalks of course. This time will mostly be during the spring and early summer. If you hold off on harvesting then you will quickly notice that the plant starts flowering. Then the flower will be stronger in the flowers instead of the stalks.

Water the soil a little bit after harvesting large amounts to help the plant regrow more quickly. Since we can’t really move the plant, then this is the best we can do to aid the plant.

How To Store Fresh Chives

After you have harvested chives it’s important that we store it the right way to help it stay fresher for longer. We recommend you take the chives and place them in an air-tight container with some paper in the bottom. 

Leave that box in the fridge.It will keep the temperature down obviously, making it harder for bacteria to start growing on the herbs. Kept like this they will stay good for at least 1 week before beginning to wilt a little bit.

Chive Plant
Chive Plant

How To Preserve Chives

There are many ways you could go about preserving chives for the long term. Some of the ones we are doing at home are either drying it or freezing it. They stay nice and green with both methods.

How To Freeze Chives

Freezing chives might be the easiest. Just take a scissor and cut down the stalks into more manageable pieces and then freeze them in a container. That way you can just scrape out the amount that you might need.

How To Dry Chives

Drying chives is a lot more time consuming. It’s because we need to thinly slice the chives before drying them. We do this to prevent any chewiness when they are later used. Thinly slice the chives and lay them flat on a tray with some paper. Dry them in the oven at a low temperature for about 6 – 8 hours in total.

FAQ

How Do You Pick Chives So It Keeps Growing

There really isn’t any specific technique for picking chives to promote growth. Just clip them off as close to the soil as possible. That way you will continue having long and beautiful stalks growing from it.

Do Chives Regrow After Cutting

Chives might be one of the best herbs to keep at home for regrowing. They will quickly start regrowing after being harvested. Therefore you can take as much as you want without worrying about the plant being harmed.

What Part Of Chives Do You Use

There are a number of parts of the chive that you could use. We prefer the green stalks before it’s begun to flower. But the flowers and the flower buds are also great sources for flavor. They are insanely spicy and flavorful.

Additional Information

Read more articles about Preserving Your Garden

Search For More Information