Unlocking the Secrets of Orchid Root Growth: A Comprehensive Guide

orchids, flowers, plant-6256963.jpg
Home » orchid roots

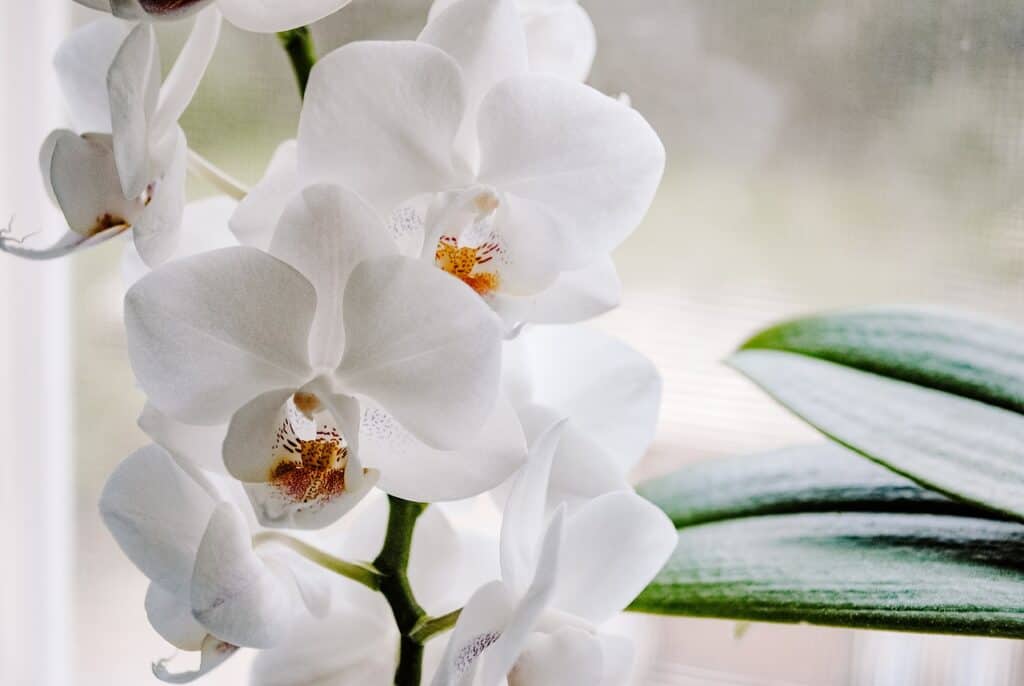
How To Encourage Orchid Root Growth

Orchids are renowned for their captivating beauty and exotic charm. While their exquisite blooms steal the spotlight, the health of their intricate root system is paramount for their overall well-being. In this comprehensive guide, we will explore the art of encouraging orchid root growth, addressing common questions and search queries that often arise in the world of orchid cultivation.

Selecting the Right Potting Medium for Robust Roots

The journey to fostering healthy orchid root growth begins with the choice of a suitable potting medium. Orchid enthusiasts often grapple with selecting the right medium for their prized plants. Frequently asked questions and related search queries in this domain include:

orchids, flowers, plant-6256963.jpg

Should I use bark or sphagnum moss as a potting medium?

  • The choice between bark, sphagnum moss, or a combination thereof plays a crucial role in root development. Each material has its unique benefits. Bark offers excellent drainage, preventing waterlogged roots, while sphagnum moss retains moisture, benefiting specific orchid varieties. The decision should align with your orchid’s species and the environmental conditions it thrives in.

How do I know when to repot my orchid for optimal root growth?

  • Repotting is a necessary task but one that should be approached thoughtfully and infrequently. Orchids favor stability and don’t require frequent repotting. Typically, consider repotting every one to two years or when the potting medium has deteriorated, affecting root health. During the repotting process, you have the opportunity to inspect the roots, trim away any dead or damaged sections, and provide fresh growing space. The right timing and technique can significantly impact the development of robust and healthy roots.

Nurturing Orchid Roots through Proper Watering

Watering is a pivotal element of orchid care that directly influences the health and vitality of their roots. The challenge lies in understanding the nuanced requirements for achieving the perfect balance. Frequent questions and search queries often revolve around the watering habits for orchids:

How often should I water my orchid for optimal root growth?

  • Orchid watering routines depend on several factors, including the type of orchid, the potting medium, and the environmental conditions. Overwatering is a common mistake that can lead to root rot. The key is to allow the top layer of the potting medium to dry out slightly between waterings. This practice ensures that the roots have access to oxygen, a critical element for their growth.

What is the impact of humidity on orchid root growth?

  • Adequate humidity is vital for orchid root development. Orchids thrive in environments with suitable humidity levels. Employing tools like humidity trays, room humidifiers, or periodic misting of your orchids helps to maintain the optimal moisture balance for root growth. Monitoring the moisture levels in your potting medium and understanding the specific water requirements of your orchid species are vital for root health.
orchid, dendrobium, purple-172206.jpg

Fertilization: Feeding Orchid Roots with Care

Fertilization is a critical aspect of orchid care that directly influences root growth. Orchids have specific nutrient requirements, and using a specialized orchid fertilizer is essential. Frequently asked questions and search queries often revolve around the art of orchid fertilization:

How often should I fertilize my orchid for optimal root growth?

  • Orchids require specialized orchid fertilizer to thrive. A balanced fertilization schedule tailored to your specific orchid type is essential. Over-fertilization can harm the roots, so it’s essential to avoid this common mistake. The right amount of nutrients at the right time will contribute to robust root growth and overall plant health.

What are the signs of over-fertilization and how does it affect orchid roots?

  • Over-fertilization can manifest in various ways, such as leaf discoloration or burning. The excessive buildup of salts in the potting medium can hinder root function and lead to root damage. Understanding the signs of over-fertilization and its impact on roots is crucial for maintaining their health.
orchid, white, white orchid-2181044.jpg

Nurturing Orchid Roots for Lifelong Beauty

Encouraging healthy orchid root growth is an art that requires an understanding of the intricacies involved in orchid care. By selecting the right potting medium, mastering the art of watering, and fertilizing with care, you can unlock the secrets of robust root growth. These practices not only lead to healthier roots but also contribute to the enduring beauty of these magnificent plants. Orchids are resilient, and with the right care, they can grace your space with their timeless charm for years to come.

How To Trim Orchid Roots

orchids, blue, flowers-4759196.jpg
Home » orchid roots

Orchids are widely known for their gorgeous blooms and distinctive fragrances. However, budding orchid enthusiasts tend to forget about the significance of trimming their orchid roots. A healthy root system is directly related to the well-being and growth of orchids. Thus, understanding how to trim orchid roots is one of the primary techniques for taking care of these beautiful plants. Moreover, a well-managed root system can significantly contribute to the orchids’ longevity.

orchids, blue, flowers-4759196.jpg

Understanding the benefits of trimming orchid roots.

When it comes to taking care of orchids, the roots play a crucial role in plant health. Trimming orchids is primarily done to maintain the health of roots and encourage new growth. The primary benefits of trimming orchid roots include:

1. Promotes healthy root growth: Trimming orchid roots redirects the plant’s energy to healthier regions while eliminating any dead, rotting or damaged roots. The orchid then puts its energy towards new roots emerging from healthy sections.

2. Prevents root rot: Improper drainage and overwatering often result in root rot. Trimming off any infected roots reduces the chances of the rot spreading to other parts of the plant, ultimately saving the orchid.

3. Improves nutrient and water absorption: Trimming orchid roots creates an environment for new root development. The new growth offers a better opportunity for the orchid to absorb nutrients and water, improving its general health and growth.

4. Encourages new blooms: Orchids usually require a dormant period, where new root development occurs before new blooms are produced. Trimming off dead and damaged roots speeds up the orchids’ dormant period, which subsequently leads to new flower growth.

The impact of overgrown and damaged roots on orchid growth.

Overgrown or damaged roots can significantly affect the health and growth of orchids. Overgrown roots can lead to root crowding, which limits the plant’s overall growth. Damaged roots can impair nutrient and water uptake, leading to a weaker and stunted plant. Here are some of the negative effects of overgrown and damaged orchid roots:

1. Stunted growth: Overgrown roots often cause root crowding, which ultimately affects the orchid’s growth. Root crowding leads to the circulation of stagnant water around the roots, which suffocates the plant.

2. Inadequate nutrient absorption: Damaged roots might impair the amount of nutrients that are being taken up by the orchid, leading to nutrient deficiency.

3. Poor Water absorbance: Damaged roots also lead to waterlogging and inadequate water uptake, leading to root rot and ultimately plant death.

4. Impaired Immune System: Damaged or overgrown roots might lead to weaker plants that are vulnerable to diseases and pest attacks.

When and how to trim orchid roots.

Knowing when and how to trim orchid roots significantly impacts the orchid’s growth and overall health. It is critical to establish the orchid’s current root health before trimming or repotting. Here is what you should know before trimming orchid roots:

The best time to trim orchid roots.

Spring is usually recommended as the best time to trim orchid roots. This is because the plant is in its active growth phase, where it can quickly recover and establish itself with new growth. Moreover, trimming orchid roots prepares it for the upcoming dormant phase. Ensure that you only trim your orchid roots if your plant shows any indication of root rot or overcrowding.

The tools and techniques for trimming orchid roots.

Before you start trimming your orchid, make sure you have the right tools in place. Ensure that your equipment is disinfected to minimize the risk of spreading any disease. You will need:

1. A pair of clean and sharp pruning shears.

2. A spray bottle filled with 70% isopropyl alcohol to sterilize the pruning shears.

Techniques for trimming orchid roots.

1. Remove any dead or damaged roots. Dead roots can be characterized by their brown and brittle nature, while damaged roots are often soft and discolored.

2. Cut any overgrown roots. Overgrown roots can be trimmed back to the base of the plant. Ensure that you leave only healthy roots that have multiple, healthy growth points.

3. After trimming, rinse and dry the roots before repotting or rehanging.

plant, flower, orchid-6691763.jpg

Tips for successful orchid root trimming

Trimming orchid roots requires a delicate balance not to cut off more than necessary. Here are some tips to help you succeed in trimming your orchid roots:

Knowing when to stop trimming roots.

When trimming orchid roots, it’s important to know when to stop as over trimming the plants can have adverse effects. Ensure that you leave enough healthy roots that can support the plant without compromising the plant’s health. Overtrimmed orchids have little to no opportunity to absorb enough water and nutrients, leading to stunted growth or the ultimate death of the orchid.

Nurturing trimmed orchids for optimal growth.

Nurturing trimmed orchids is a process that requires careful attention to detail. The following tips will enable you to provide a nurturing environment for your freshly trimmed orchids.

1. Repot in fresh potting mix: After trimming, repot the orchid in a potting mix that allows for good drainage. The fresh potting mix also provides additional nutrients.

2. Provide optimum light: Orchids require good amounts of light to grow and remain healthy. Place your orchids in a location that receives bright, but non-direct sunlight.

3. Water and feed correctly: Always ensure that your orchids are adequately watered and fed. Monitor the moisture in the soil to ensure that you only water your orchid when necessary. Delicate-fertilize the orchid regularly for optimal growth.

4. Avoid overpotting: Orchids thrive best in restrictive environments, and overpotting them can significantly harm their growth. Only repot the orchid when necessary, leaving enough space for new growth.

Conclusion

Trimming orchid roots is an essential aspect of taking care of orchids. A healthy root system contributes remarkably to the plant’s general well-being, growth, and longevity. Incorrect trimming of orchid roots can significantly impact the plant’s health and growth. Therefore, always ensure that you establish the orchid’s current root situation and trim only what is necessary. Finally, consistently providing a nurturing environment for your orchids, guarantees a positive outcome, and a beautiful orchid display.

How To Tell If Orchid Roots Are Dead

orchid, flower, blossom-3323149.jpg
Home » orchid roots

Check the health of your orchids regularly. Like any other plant, orchids are susceptible to diseases, pests, and infections that can hinder their growth and overall well-being. One of the most crucial parts of an orchid’s health is its roots. In most cases, the roots serve as a sign of the plant’s overall condition. Thus, it’s essential to check the roots’ health regularly to ensure that your orchid continues to thrive.

This guide will help you determine if your orchid’s roots are dead, and what you need to do to keep your plant healthy.

orchid, flower, blossom-3323149.jpg

Understanding the role of roots in an orchid’s overall health

Orchids’ roots serve several important roles. The roots’ primary function is to absorb water and nutrients from the potting medium (typically bark or sphagnum). Without a healthy root system, an orchid cannot absorb the necessary nutrients to grow and thrive.

Moreover, the roots also anchor the orchid in its potting medium and provide structural support. They also regulate the moisture levels and control airflow, ensuring that the orchid isn’t waterlogged or dried out.

In essence, your orchid’s overall health depends on its root system. It’s essential to know when and how to check if the roots are healthy.

Signs to look for in determining if your orchid’s roots are dead.

One of the first signs of root damage is black or brown discolorations of the roots. Dark roots are usually an indication of root rot or fungal infection, which can be fatal to your orchid if left untreated.

Black, mushy root tips indicate that the root has started to die and is no longer functional. This problem can quickly spread from one root to another, and you must act quickly to correct it. Cutting off only the blackened portion of the root and applying hydrogen peroxide to the remaining portion can help save the plant in such a situation.

Soft and mushy roots and what they mean.

Mushy or soft roots are another sign of a dead or dying root system. It is usually caused by overwatering or poor drainage that leads to a waterlogged potting medium. The lack of oxygen causes the roots to rot, and they become soft and mushy, making them unable to absorb water and nutrients.

If you detect mushy roots when inserting a skewer or pencil into the potting medium and there is moisture on it, it’s time for immediate action because such roots can easily rot through to the crown of the plant.

A step-by-step guide to checking if your orchid’s roots are dead.

To check an orchid’s root system for signs of damage, you need to remove it from its pot carefully.

Turn the pot upside down and tap the bottom until the orchid slides out. If it’s stuck, try gentle prying without damaging the stem.

How to differentiate between dead and healthy roots.

Once you remove the orchid’s potting medium, examine the roots for any signs of damage. Healthy orchid roots are thick and rounded, with silver or off-white tips. Conversely, dead or dying roots are thin, flattened, and black or brown in color.

Use a pair of disinfected scissors or knives to cut through the roots and isolate those that are dark-colored and mushy. The healthy white roots should be firm, and plump and provide resistance when you make the cut.

Once the analysis is complete, count the number of healthy and dead roots. If the majority of roots are healthy and only a few are rotten, you can still save the plant.

What to do IF you find dead roots.

Orchids can recover from root damage when treated correctly. Therefore, removing dead roots as soon as possible is necessary. Cut the dead and mushy roots using a sterilized cutting tool until you reach healthy, firm roots.

Re-potting your orchid and treating it to save the remaining healthy roots.

The next step is re-potting the orchid in a suitable pot. Choose a pot only slightly larger than the current one, so the orchid’s root system fits snugly. Remove any old potting medium, and lightly rinse the roots to help remove any residual media or dead matter.

Apply a small amount of root hormone to the remaining healthy roots before placing the plant into the new pot. Fill with fresh potting medium, making sure not to pack it too tightly.

Finally, place the orchid in a shady area and wait a few days before watering it. Gradually increase the light conditions until the plant gets its natural glow.

orchids, flowers, orange flowers-3778816.jpg

Preventing root problems in orchids.

Prevention is always more effective than waiting to react until an issue arises.

Maintenance tips for healthy orchid growth.

Healthy orchids don’t often fall victim to dead roots caused by negligence or poor care. Here are a few tricks you can use to keep your orchids healthy:

– Water your orchids correctly – make sure the potting medium dries out completely before you water again.

– Use high-quality orchid mix or potting medium – orchids require unique and well-drained growing conditions.

– Ensure proper humidity – spray your orchids with water regularly to keep their moisture levels optimum.

Common mistakes to avoid when caring for orchids.

It’s easy to make mistakes when caring for orchids. You may be overwatering, underwatering, or putting them in too bright sun conditions.

To avoid these mistakes, be sure to learn about your orchids’ specific needs and adjust your care accordingly. Be careful not to overfertilize, enable good air movement, and keep the right moisture levels at all times.

Conclusion

The key to growing healthy and bountiful orchids is to understand the importance of their root system. Checking their roots’ health regularly and taking proactive measures will ensure that your orchids continue growing strong and bright flowers.

By following this guide, you can detect and diagnose root damage and take the necessary corrective measures. Moreover, be sure to follow care tips for optimal orchid growth to prevent further problems.